TechnoTim has a great video on how to deploy ubuntu VMs on proxmox using cloud init. I’ve used this exact guide to deploy my machines for years now, and even automated it with Ansible. Now, I’m attempting to expand my Ansible roles to support other potential operating systems that I may want to run in my homelab. One of those being Fedora.
Why Fedora?
Honestly, because I have an M1 Mac Mini serving my homelab, which runs Asahi linux. Asahi is the only linux distribution for Apple silicon. They used to be based on Arch, but recently partnered with Fedora to provide a more stable distro. When testing my Ansible roles, I need a fedora machine to test against. If it weren’t for that, I would probably be sticking with Ubuntu and not even bothering with this.
What is Cloud Init?
From the official docs: Cloud-init is the industry standard multi-distribution method for cross-platform cloud instance initialisation.
But what the heck does that mean?
Basically, cloud init can detect what cloud provider an instance is running on, and automatically set up users, passwords, networking and ssh keys. You don’t need to run through an install wizard every time you deploy a VM. You just deploy the VM, wait for it to come up, and then SSH in.
Prerequisites
The ‘cloud provider’ in my case is Proxmox. Which is actually a local hypervisor, but it does support cloud init. If you’re following along, I’ll assume you have your own Proxmox host or cluster. I’ll also assume that you’ve created VMs in Proxmox before, or are capable of figuring out some of the simpler details that I’ll be glossing over.
Download the Fedora Cloud Image
At the time of this writing, the latest Fedora version is Fedora 40. You can find the Fedora 40 cloud image at https://fedoraproject.org/cloud/download. We’re looking for the QEMU or qcow2 format.
If you download it to your local computer, you’ll need to get it onto your Proxmox host somehow. You could use SCP:
scp /path/to/fedora-cloud-image.qcow2 root@proxomox-ip-or-hostname:/root/fedora-cloud-image-filename.qcow2
But an easier way would be to just use wget from within your Proxmox host itself. You can accomplish this either by opening a shell session in the Proxmox web UI, or SSHing into your proxmox host. But first, we need the URL for the direct download.
On Fedora’s download page, hover over the download button, right click and select ‘copy link address.’ Make sure you do this if you’re following along, as you may be downloading an old version of Fedora if you’re blindly copy-pasting.
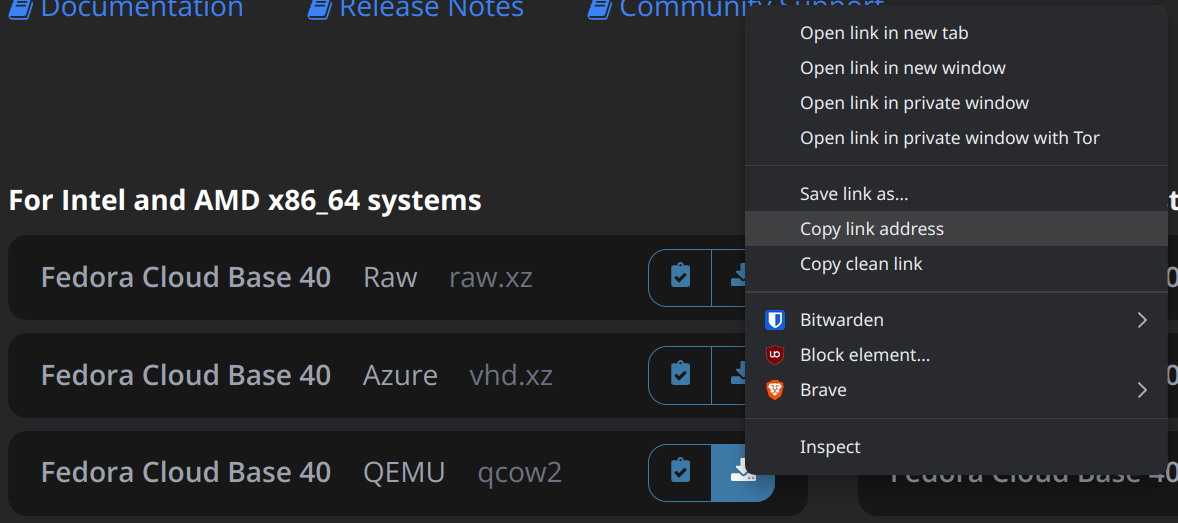
Then, run the command. Replace the URL with the URL obtained in the previous step. If Fedora 40 is still the current release at the time you’re reading this, you should be able to copy and paste the below command. But, I’m a random person on the internet, so blindly copying and pasting commands like this without verifying the URL isn’t usually best practice.
wget https://download.fedoraproject.org/pub/fedora/linux/releases/40/Cloud/x86_64/images/Fedora-Cloud-Base-Generic.x86_64-40-1.14.qcow2
Create a template
Next, we’re going to create a template VM. This VM will boot into the Fedora Cloud image and initialize itself with the user and network settings that you set in the Cloud Init tab on the VM settings.
Create a VM with no OS
Now, we’ll run through the VM creation wizard to create a VM with no OS. The reason for this, is that we’ll be attaching a Cloud Init CD-ROM and the Fedora Cloud image as the primary disk to this VM.
Normally, you would select an ISO file to boot into and run through an installer to configure an operating system. The operating system would be written to a target drive, or a virtual hard drive in this case. But Cloud Init is going to take care of all of that for us.
We’ll still end up with a CD-ROM drive (where the ISO would normally go), this will be the Cloud Init drive. We’ll also still end up with a virtual hard disk, however this hard disk will be the imported Fedora Cloud image that we just downloaded, not a blank disk. The confusing part is that the VM never actually boots to the CD-ROM – we’ll cover that later.
Alright, let’s create the VM. Right click on your node and select Create VM. On the Create: Virtual Machine wizard, give the VM a VMID, a name, and select the target node.
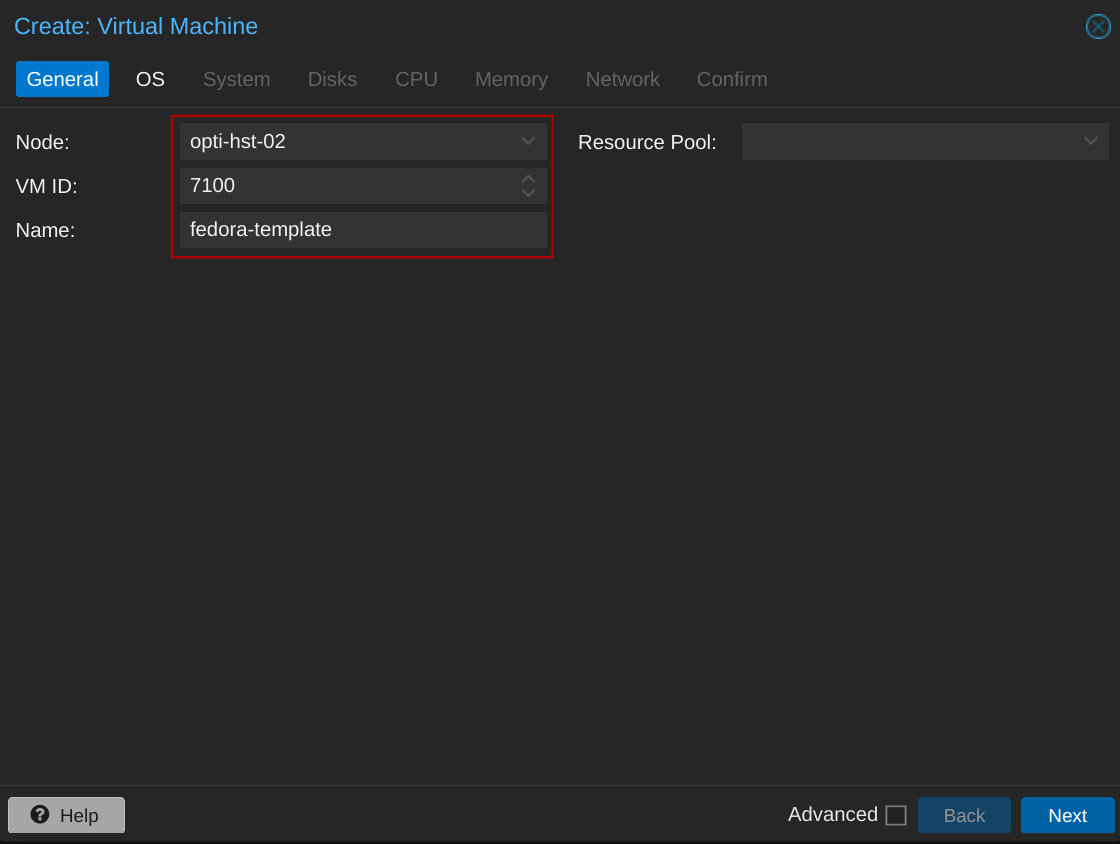
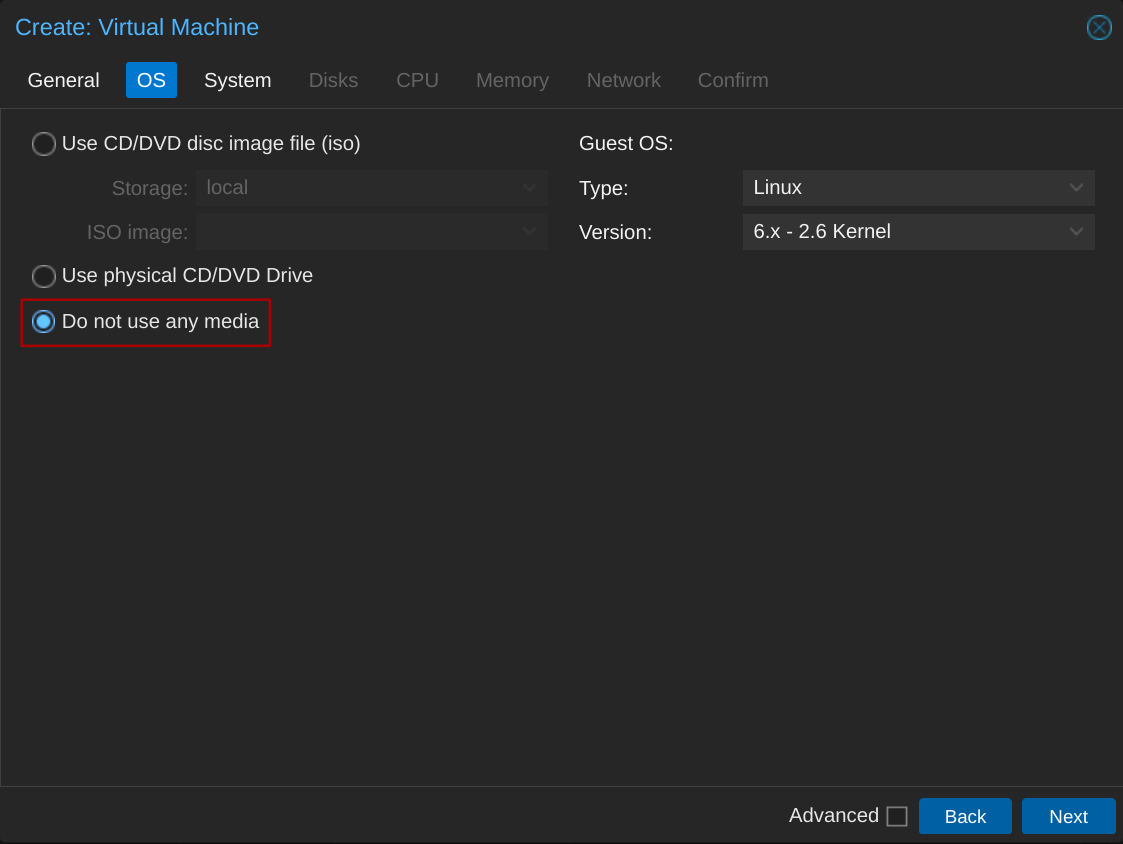
Next, make sure you select Do not use any media
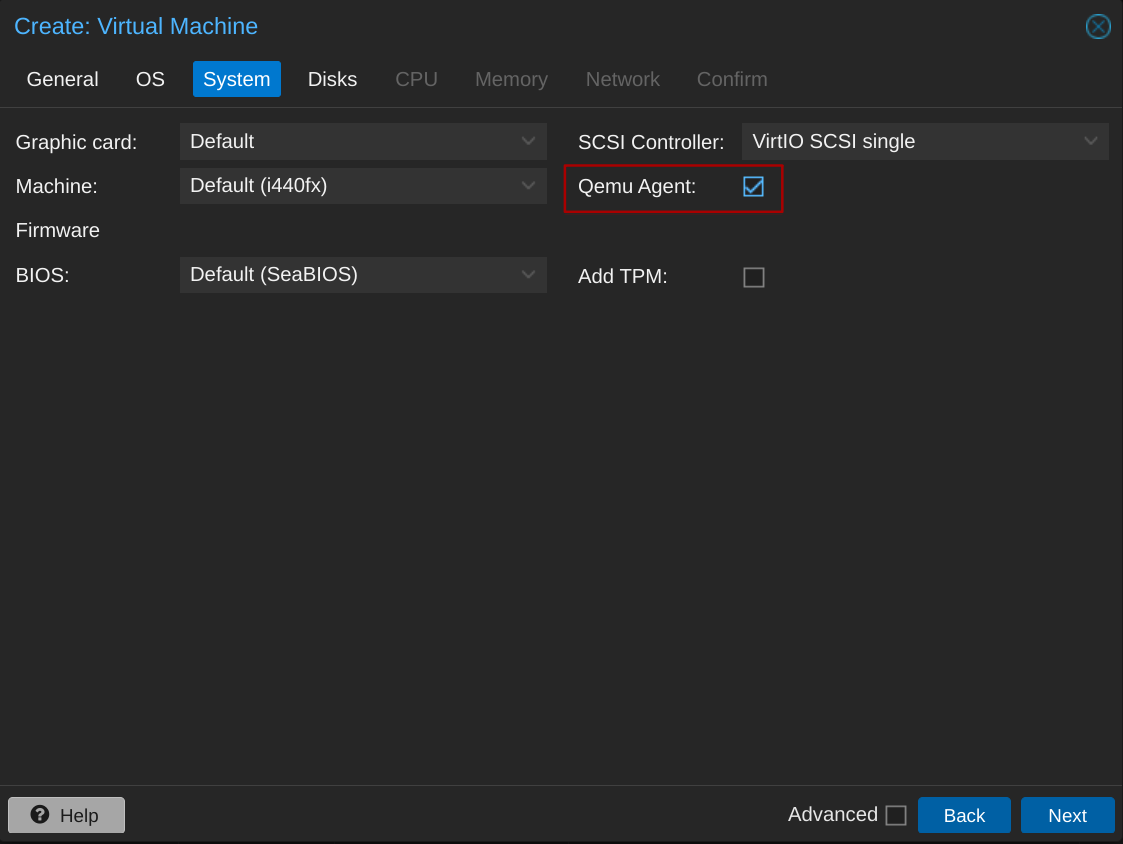
On the System screen, I like to ensure the Qemu Agent is installed. This allows you to see information about the VM in the Proxmox web UI (like the VM’s IP address).
We’ll create the VM’s disk using the qcow2 image that we downloaded from Fedora’s website, so make sure you delete the default disk.
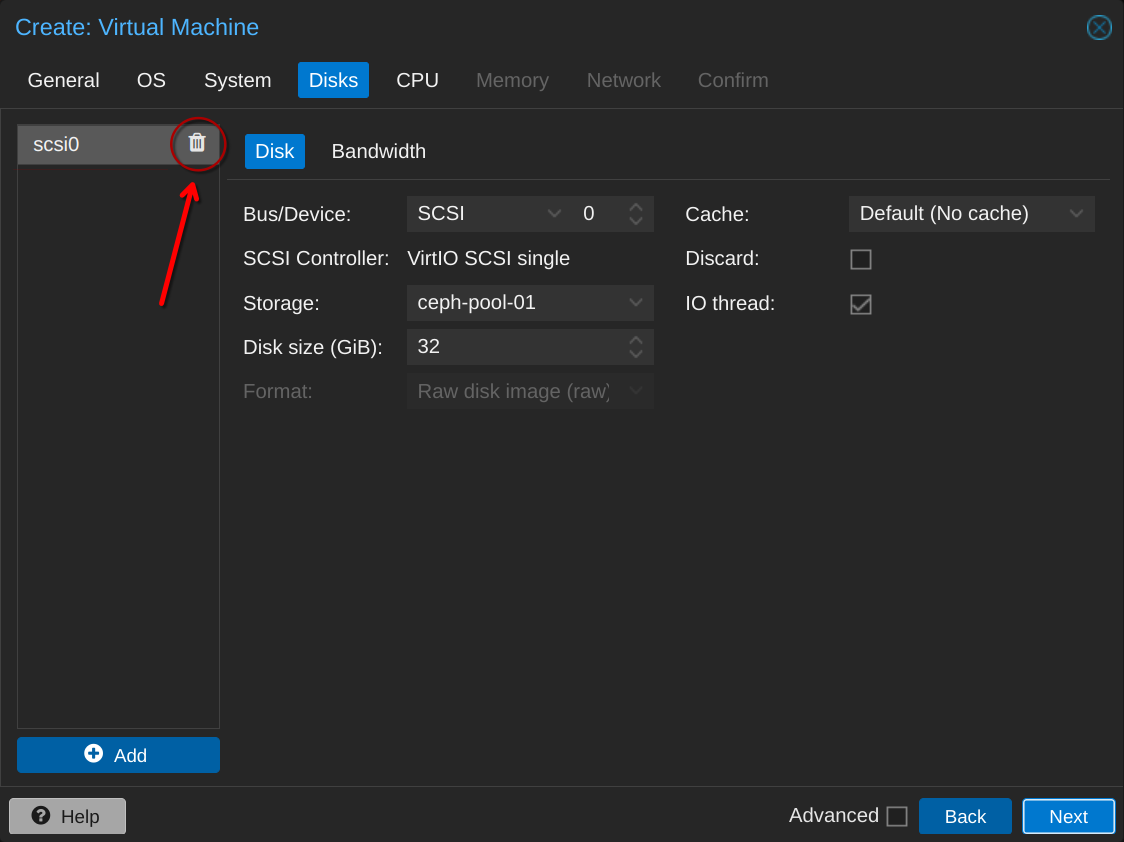
Select whatever you want for CPU and Memory, and make sure you select the appropriate network bridge for your environment. All of these values can easily be changed later, so don’t sweat them too much. Just pick sensible defaults.
Then, on the confirm screen, make sure you leave ‘Start after created’ unselected. It’s important that you do not boot up the VM until after it has been converted to a template. If you accidentally turned it on, it’s best to just delete the VM and start over. There are ways to do damage control to save the template, but it’s honestly easier to just blow it away and start over. This whole process isn’t very labor intensive to begin with.
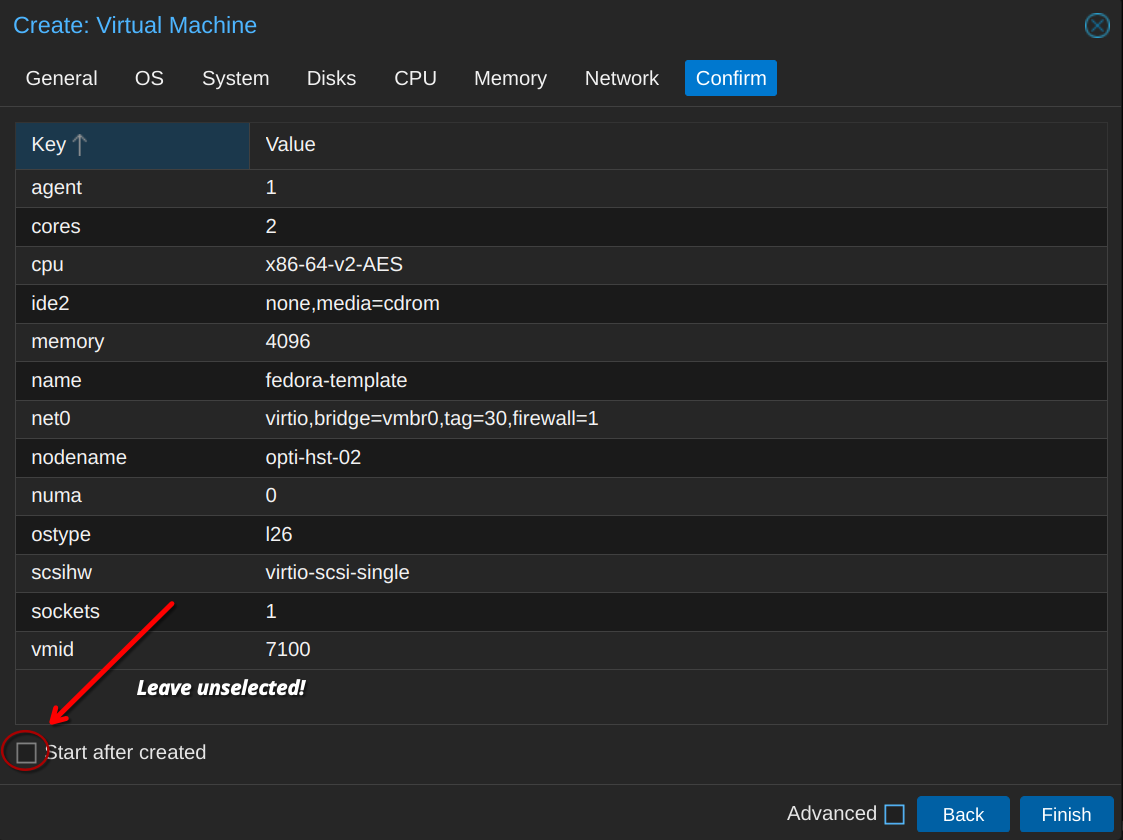
Click Finish. While the VM is deploying, open a shell session in the Proxmox web UI, or SSH into your Proxmox host. We have a few quick commands to run.
Import the qcow2 disk
First, import the qcow2 disk (that we downloaded from Fedora earlier with wget) to the VM that we just created. The command syntax looks like this:
qm disk import <VMID of the VM we just created> <full path and filename of the qcow image that we downloaded from fedora> <the target storage of the disk on the proxmox cluster>
My target storage is ceph-pool-01. Yours might be local-lvm if you have a simple Proxmox installation. Example:
qm disk import 7100 Fedora-Cloud-Base-Generic.x86_64-40-1.14.qcow2 ceph-pool-01
Configure the qcow2 disk
Now, we need to configure that imported disk to use the virtio-scsi-pci driver and set it to scsi0 on our VM. That command looks like this:
qm set <VMID of the VM we created> --scsihw virtio-scsi-pci --scsi0 <your target storage>:vm-<VMID of the VM we created>-disk-0
Example:
qm set 7100 --scsihw virtio-scsi-pci --scsi0 ceph-pool-01:vm-7100-disk-0
Create a Cloud Init drive
Finally, we need to configure the existing virtual CD-ROM drive to be a Cloud Init drive. That syntax looks like this:
qm set <VMID of the VM we created> --ide2 <target storage>:cloudinit
Example:
qm set 7100 --ide2 ceph-pool-01:cloudinit
Set the boot drive
Like I said before, you might wonder why the VM isn’t booting from the CD-ROM. Well, we’re not running an installer here. We don’t need to boot off of temporary media, write a bunch of changes to a target disk, and then reboot off of that target drive. That’s already been baked in to the Fedora Cloud image. The only reason for the CD-ROM/Cloud Init drive is so that the Fedora Cloud image is aware that configurations are being made with Cloud Init.
So, we need to ensure that the VM is booting off of the scsi0 drive (which is the virtual drive we assigned to the imported Fedora Cloud image). The default boot order will have the VM attempting to boot off the CD-ROM drive. Click on Options, double click on Boot Order and make sure it looks like this:
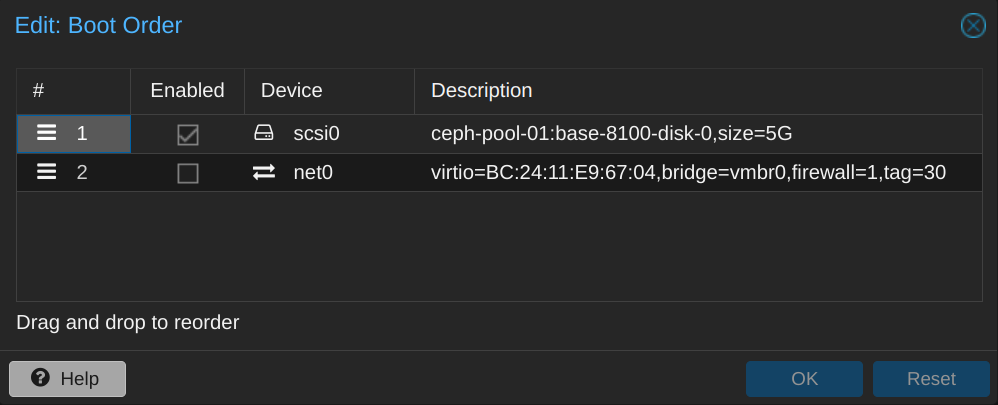
Once you deselect the CD-ROM drive, it may disappear from the options as you see in the above screenshot since it isn’t a bootable disk.
Convert the VM to a template
With all of that done, we’re ready to convert the VM to a template so that we can clone it later to spin up VMs. Right click on the VM and select Convert to template.
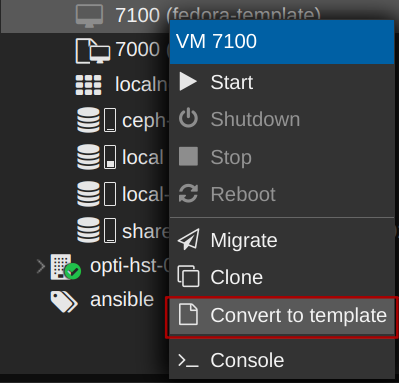
Clone the template
Now, any time you need a Fedora VM, you can simply clone this template. Once cloned, adjust the hardware settings as necessary (CPU, Memory, Network etc.), then go to the Cloud-init tab and enter your desired user settings. You can create a user, define that user’s password and SSH key, and even set the VM’s IP address and DNS settings.
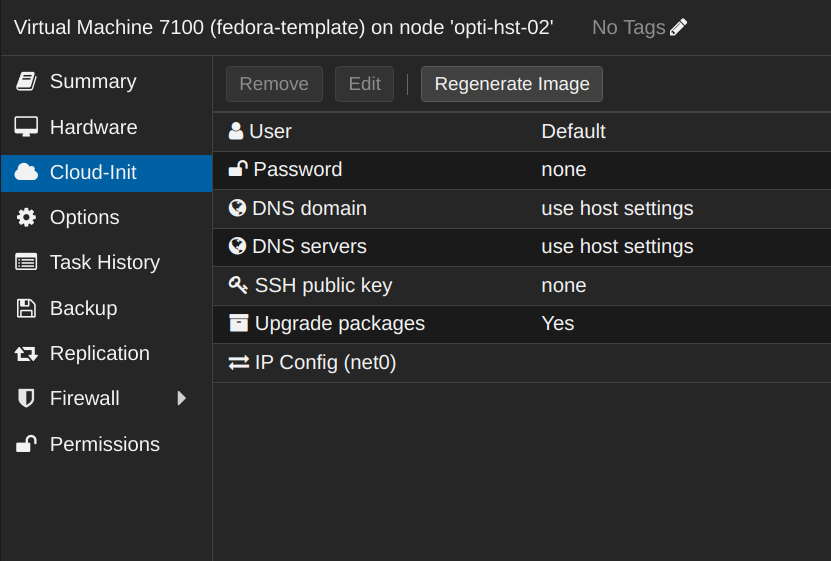
Key settings to change before powering the VM on
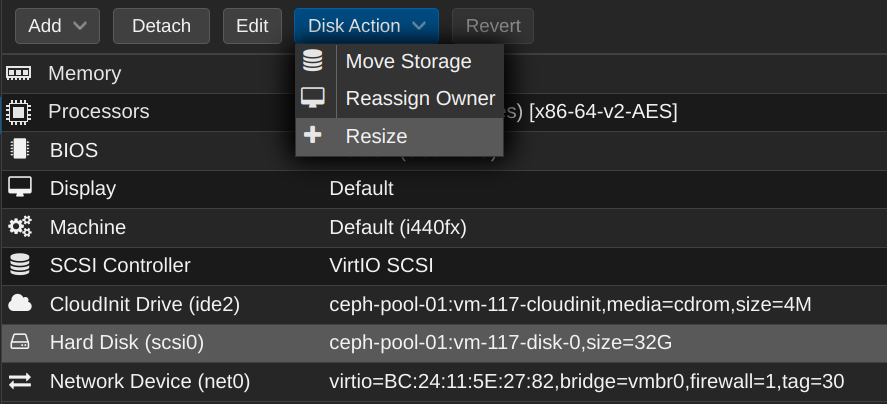
Ensure you resize the scsi0 disk before booting the VM up for the first time. The default size of the Fedora Cloud image is only 5G. Click on the disk, then select Disk Action and Resize.
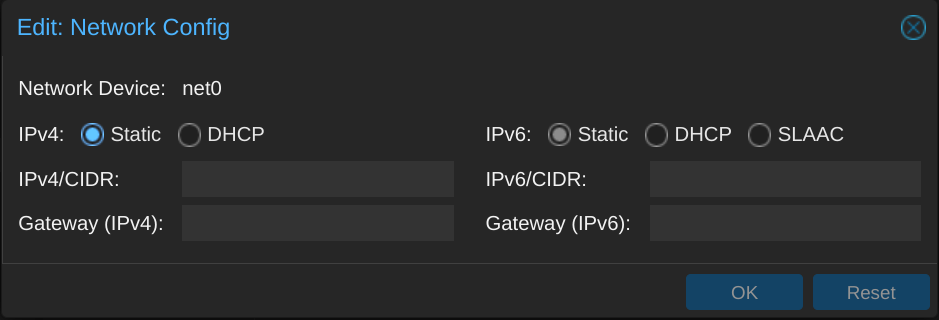
Ensure you check the network settings before powering the VM on. The default setting in Proxmox is a blank static IP, so if you don’t set this, you won’t be able to SSH into your new VM.
Conclusion
And that’s it! You have a Fedora Cloud Init template at your disposal to quickly spin up VMs on your Proxmox cluster. I’ve been using this method to deploy VMs for years now, and it really simplifies the process. I’ve even written Ansible playbooks that can use this method to automate VM creation in a semi-declarative manner. (That github repo is a mess right now, I’m working on cleaning it up… don’t judge).
