Introduction
A while back I flung myself head-first into the deep, dark rabbit hole that was learning Ansible. The more I learned about it, the more I began using it for everything; even if it wasn’t the best tool for the job, like provisioning VMs in Proxmox.
I started writing a playbook for my homelab with the intentions of it being a single master playbook that could configure my entire homelab in a single run. This playbook has spiraled into an absolute behemoth and it is definitely not perfect. Through the process of writing it, I’ve developed a unique way of deploying services to my homelab.
I don’t use Docker compose and I rarely deploy a container using docker run commands unless I’m quickly testing something. I do everything with my playbook and custom Ansible roles. At times it’s clunky and inefficient. Other times, it’s fast and effective. The differentiator being whether my playbooks are working as expected.
What follows is an explanation of the good, bad and the ugly of this monster playbook I use to manage my homelab. If you want to follow along with the code itself, pull up another tab to the playbook’s github repo at https://github.com/joshrnoll/ansible-playbook-homelab
The Architecture
I go into detail on my homelab architecture in the homelab section of this website. But here’s a quick once-over:
- Everything is on Tailscale
- Everything is a Docker container with a Tailscale ‘sidecar’ container.
- DNS entries are publicly resolvable A records in Cloudflare which all reference the Tailscale IP of my Traefik instance
- Traefik uses a forward-auth header to redirect to Authentik if the service doesn’t natively support Oauth/OIDC.
- Everything is deployed with my massive Ansible playbook.
Custom Roles
As I learned more about Ansible, I quickly learned the concept of an Ansible role. An Ansible role is like a function in programming. It’s basically a series of tasks that you might otherwise re-write over and over again. By writing the tasks as a part of a role, rather than directly in the playbook, you can easily re-use these functions in other playbooks.
I quickly realized there were a few things, somewhat unique to my setup, that I would want to be re-usable so that I didn’t have to re-write the same tasks over and over again:
- Baselining my servers with desired settings and copying my SSH public key to them
- Installing Docker and setting up Portainer and Nautical Backup
- Deploying a Docker container with Tailscale
- Deploying a VM template to Proxmox and provisioning VMs
So, I took the dive to learn how to write Ansible roles. I wrote a role for each of these functions and and published them to Ansible Galaxy (a repository, similar to Dockerhub, where your roles can be downloaded and used by others). You can install them and use them yourself in your own playbooks. I put quite a bit of effort into their documentation – I would love for them to be useful to someone else someday!
My homelab playbook then leverages these roles. To get an idea for what the roles are doing, you can visit the README on the roles’ github repo, or the Documentation tab on Ansible Galaxy.
To dig into the code, look in each role’s tasks folder. This is what the role is executing whenever it is called. Some may contain multiple files – in this case you would start with main.yml and see where tasks from the other files are included or imported conditionally.
The Playbook
The term playbook (singular) is misleading here, because this is actually a ton of individual playbooks. At the root, you’ll see a file main.yml – this calls all of the playbooks contained in the repo using the import_playbook function.
The Structure
The playbook has the following directory structure:
├── baseline
│   └── proxmox
├── containers
│   ├── container-1
│   └── container-n
├── host_vars
├── maintenance
├── roles
│   └── deploy_container
│       ├── defaults
│       ├── files
│       ├── handlers
│       ├── meta
│       ├── tasks
│       ├── templates
│       ├── tests
│       └── vars
├── services
│   ├── docker
│   └── pihole
├── tailscale-info
├── vars
├── hosts.yml
├── main.yml
└── run.sh
You’ll notice additional files in the github repo other than what is listed, but these are the important ones for understanding how everything works.
From top to bottom:
- baseline: This directory contains the necessary playbooks for baselining my servers and VMs. This contains tasks like ensuring the firewall is configured, the correct time zone is set, and my SSH public key is copied to the machine.
- containers: This directory contains a sub-directory for every container that runs in my environment. Each sub-directory contains the necessary playbook or playbooks required to deploy the service.
- host_vars: This directory is where I define the hosts in my environment. On github you will see a single example file here, but in reality there is one file per host. When you write your hosts file, you can then refer to the hosts by the name of these files rather than writing everything out in the hosts file.
- maintenance: This contains playbooks used for updating OSes and pruning unused docker resources. It’s not called by main.yml – I call it manually when I’m doing maintenance.
- roles: This is where I’ve created a matrix-like environment. This directory is where ansible first looks for any custom roles. However, in my case, my roles are published to Ansible galaxy, so what gives?. This directory contains a single, local role (not published to Ansible Galaxy) which uses my tailscale_container role (which is published to Ansible Galaxy), but adds in the functionality of adding the necessary traefik labels and creating my Cloudflare DNS records.
- services: This directory contains playbooks for installing additional functionality onto servers and VMs. Namely, Docker. You’ll notice a playbook for pihole as well, but this is incomplete and I’ve never actually used it.
- tailscale-info: This is a git submodule to another repo on my github where I provide documentation on how Tailscale is used throughout my homelab. It’s really just there to augment the README.
- vars: This contains two variable files, one of which you won’t see on github. One is the vms_to_create.yml file which is referenced in one of the baseline playbooks for provisioning VMs. The other is a secrets.yml file, which is gitignored. This file is protected with Ansible vault and contains any variables that may be sensitive in nature, like API keys. I tend to overuse this because Ansible vault is so easy to work with.
- hosts.yml: This file is also gitignored, but this is what Ansible calls an inventory file and it contains all of the hosts to be targeted by your playbooks.
- main.yml: This is the ‘main playbook’ which is simply using the import_playbook function to call all of the other playbooks.
- run.sh: Because my playbook was also designed to create the VMs that it will inevitably configure, I couldn’t simply call main.yml. I needed to call the playbook for creating the VMs first, then after they were created I could call main.yml. This is just a simple bash script that does exactly that. Sometimes I use this to run the whole thing, sometimes I will just call the individual playbook in question if I’m just making a quick configuration change to a service.
The Inventory
An Ansible inventory is where you define the hosts that Ansible will SSH into to run playbooks. Hosts are placed into groups, which can be referenced at the top of a playbook to tell Ansible to only execute the playbook against hosts in that group.
I use YAML format for my hosts file, though you can use INI format as well. My hosts.yml file looks something like this:
##########################
# PROXMOX HOST BASELINES #
##########################
proxmox_hosts:
  hosts:
    opti-hst-01:
    opti-hst-02:
    opti-hst-03:

####################################
# USED FOR MANAGING VMS IN PROXMOX #
####################################
proxmox_api:
  hosts:
    opti-hst-01:

#######################
# SERVER OS BASELINES #
#######################
ubuntu:
  hosts:
    media-srv:
    vm-110-ubuntu:
    vm-125-ubuntu:
    nextcloud-srv:

fedora:
  hosts:
    asahi:
    vm-120-fedora:

#####################################################
# SERVERS WITH DOCKER AND NAUTICAL BACKUP INSTALLED #
#####################################################
docker:
  hosts:
    media-srv:
    vm-110-ubuntu:
    vm-120-fedora:
    vm-125-ubuntu:
    asahi:
    nextcloud-srv:
    nuc-01:

######################
# ALL OTHER SERVICES #
######################
jellyfin:
  hosts:
    vm-110-ubuntu:

mealie:
  hosts:
    vm-110-ubuntu:
The top level defines the group, and then under the hosts: section, a list of hosts are defined as members of that group. I essentially have a group for each playbook that I’ve written. So, if I want a host to receive the Docker playbook, it’s added to the docker group. If I want a host to receive the Jellyfin playbook, it’s added to the jellyfin group, and so on. Hosts can be members of multiple groups at one time, so this works out for me, although there is likely a better way of organizing it.
Each host has it’s own file in the host_vars directory. That file needs to be the same name as the host in the hosts.yml file – so vm-110-ubuntu has a file in host_vars called vm-110-ubuntu.yml – and they look like this:
---
ansible_host: 10.0.30.35
ansible_user: josh
...
This file defines the host variables like what the host’s hostname/IP address is and what user to use when Ansible SSHes into the machine. You can define more variables here, but these are the two that I use in my setup.
Server Baseline
The first playbook is my server baseline playbook. This is comprised of three playbooks, one for baselining my Proxmox nodes, one for creating VMs, and one for baselining everything else. The Proxmox playbooks need to be called individually, but the main baseline playbook is called by main.yml at the root of the repo.
The reason for this is that I haven’t quite cracked the egg on getting these two to run in succession with one another. Because Ansible playbooks are pre-processed, meaning it checks connections and gathers facts before a playbook is ran, I can’t run the subsequent server baseline roles against VMs that haven’t been created yet. Ultimately, I’ll eventually replace this functionality with Terraform anyway, I just haven’t gotten around to that yet.
All this to say, this could use some re-organization. But, at the time of this writing, you’ll find a proxmox folder that contains a main.yml which looks like this:
---
- name: Baseline Proxmox hosts and create VM templates
  hosts: proxmox_hosts

  tasks:
    - name: Import variables
      ansible.builtin.include_vars:
        dir: "{{ root_playbook_dir }}/vars"

    - name: Baseline hosts
      ansible.builtin.include_role:
        name: joshrnoll.homelab.server_baseline
      vars:
        server_baseline_created_username: josh
        server_baseline_tailscale_oauth_client_secret: "{{ tailscale_servers_oauth_client['secret'] }}"
        server_baseline_timezone: America/New_York
        server_baseline_proxmox_packages:
          - tmux

    - name: Create VM templates
      ansible.builtin.include_role:
        name: joshrnoll.homelab.proxmox_template_vm
      vars:
        # Required to provide at least one
        proxmox_template_vm_distros:
          - fedora
          - ubuntu

        # Required proxmox credentials
        proxmox_template_vm_proxmox_username: "{{ proxmox_username }}"
        proxmox_template_vm_proxmox_api_token_id: "{{ proxmox_api_token_id }}"
        proxmox_template_vm_proxmox_api_token_secret: "{{ proxmox_api_token_secret }}"

        # Optional customizations for ubuntu
        proxmox_template_vm_ubuntu_storage: "ha-zfs-storage"
        proxmox_template_vm_ubuntu_name: ubuntu-2204-template
        proxmox_template_vm_ubuntu_memory: 4096
        proxmox_template_vm_ubuntu_cores: 1
        proxmox_template_vm_ubuntu_ciuser: "{{ ciuser }}"
        proxmox_template_vm_ubuntu_cipassword: "{{ cipassword }}"
        proxmox_template_vm_ubuntu_sshkeys: "{{ lookup('file', lookup('env', 'HOME') + '/.ssh/id_rsa.pub') }}"
        proxmox_template_vm_ubuntu_vlan: 30

        # Optional customizations for fedora
        proxmox_template_vm_fedora_storage: "ha-zfs-storage"
        proxmox_template_vm_fedora_name: fedora-40-template
        proxmox_template_vm_fedora_memory: 4096
        proxmox_template_vm_fedora_cores: 1
        proxmox_template_vm_fedora_ciuser: "{{ ciuser }}"
        proxmox_template_vm_fedora_cipassword: "{{ cipassword }}"
        proxmox_template_vm_fedora_sshkeys: "{{ lookup('file', lookup('env', 'HOME') + '/.ssh/id_rsa.pub') }}"
        proxmox_template_vm_fedora_vlan: 30

        # Set to true if you have slow storage to avoid file locks
        proxmox_template_vm_slow_storage: true

#################################
# TO BE REPLACED WITH TERRAFORM #
#################################
# - name: Create VMs
#   ansible.builtin.import_playbook: create-vms.yml
...
Notice the ansible.builtin.include_role task. This is is where my roles from Ansible galaxy come in. Rather than this playbook being 3 times as long, I simply provide the necessary variables to the role. You’ll notice that some of the variables provided here are actually variables themselves. That is because these are stored in the secrets.yml file, protected by Ansible vault.
This playbook uses my server_baseline role to baseline the Proxmox machines and the proxmox_template_vm role to deploy cloud-init VM templates to the cluster. Commented out is the calling of the create-vms.yml playbook, which looks like this:
---
- name: Create desired VMs
  hosts: proxmox_api

  tasks:
    - name: Import variables
      ansible.builtin.include_vars:
        dir: "{{ root_playbook_dir }}/vars"

    - name: Create desired VMs
      ansible.builtin.include_role:
        name: joshrnoll.homelab.create_proxmox_vms
      vars:
        # Proxmox credentials
        create_proxmox_vms_proxmox_username: "{{ proxmox_username }}"
        create_proxmox_vms_proxmox_api_token_id: "{{ proxmox_api_token_id }}"
        create_proxmox_vms_proxmox_api_token_secret: "{{ proxmox_api_token_secret }}"

        # VMs to be created
        create_proxmox_vms_list: "{{ vms_to_create }}"
...
This playbook needs to be called first, to ensure the necessary VMs (defined in the vms_to_create.yml file) are created in Proxmox. Also, notice that the host group is proxmox_api rather than proxmxo_hosts. Because of the way the Proxmox modules work, I found this was the best way to handle VM creation. One group, proxmox_api is just a single host in the cluster, whereas the proxmox_hosts group is all of them. This prevents the tasks from sending the API call to create the same VM to three separate hosts at one time, causing timeouts and file lock errors.
Once I’ve manually called these two playbooks, I can call main.yml from the root of the repo, which uses *import_playbook to call several all other necessary playbooks. The first of which is baseline/main.yml which looks like this:
---
- name: Initial setup for all servers
  hosts: ubuntu,fedora,proxmox_hosts

  tasks:
    - name: Import variables
      ansible.builtin.include_vars:
        dir: "{{ root_playbook_dir }}/vars"

    - name: Run server baseline role
      ansible.builtin.include_role:
        name: joshrnoll.homelab.server_baseline
      vars:
        server_baseline_created_username: josh
        server_baseline_tailscale_oauth_client_secret: "{{ tailscale_servers_oauth_client['secret'] }}"
        server_baseline_timezone: America/New_York
        server_baseline_ubuntu_packages:
          - tmux
          - dnsutils
        server_baseline_fedora_packages:
          - tmux
          - bind-utils
          - cronie
          - cronie-anacron
        server_baseline_proxmox_packages:
          - tmux
...
Same concept as before, using Ansible’s include_role functionality. Notice that this playbook has different variables provided (because it is using a different role), and the host groups are ubuntu,fedora,proxmox_hosts. This playbook uses the proxmox_hosts group rather than the proxmox_api group because it is making configurations on the hosts themselves rather than calling the Proxmox API to create and configure VMs.
Installing Docker
My docker_setup role from Ansible Galaxy does a little more than just install Docker. It also, optionally deploys Portainer, a GUI frontend for managing containers, using my tailscale_container role. This means that you’ll be able to reach the Portainer instance over your Tailnet and manage your containers from anywhere.
I’ve actually since modified my playbook to not deploy portainer in the Docker setup. Because I have so many hosts running docker, I didn’t want a bunch of different Portainer instances to log in to. So, I kept portainer on one host and installed the portainer agent on the rest. This allows me to access all of my machines running Docker from a single Portainer instance.
Additionally, the docker_setup role will install Nautical backup, an rsync-based container backup solution. Nautical is effectively just another container that listens to the Docker daemon and, when it detects a new container, it will rsync a folder with the same name as the container in your home directory to a specified target folder. So, if it detects a new container named demo, it will back up the folder /home/josh/demo. This worked for my setup since all of my container volumes are organized this way anyway.
The Docker setup playbook looks like this:
---
- name: Install Docker, Portainer, and Nautical Backup
  hosts: docker

  tasks:
    - name: Include variables
      ansible.builtin.include_vars:
        dir: "{{ root_playbook_dir }}/vars"

    - name: Run Docker setup role
      ansible.builtin.include_role:
        name: joshrnoll.homelab.docker_setup
      vars:
        docker_setup_install_nautical: true
        docker_setup_tailnet_name: "{{ tailnet_name }}"
        docker_setup_tailscale_oauth_client_secret: "{{ tailscale_containers_oauth_client['secret'] }}"
        docker_setup_nas_ip_or_hostname: 10.0.30.11
        docker_setup_share_name: DockerBackups
        docker_setup_mount_path: /home/{{ ansible_user }}/dockerbackups
        docker_setup_share_username: "{{ truenas_username }}"
        docker_setup_share_password: "{{ truenas_password }}"
...
Notice that this role requires you to specify a NAS target IP and share name. This is for configuring Nautical backup. At some point I will modify the role to make the Nautical configuration optional as I’ve done with Portainer but, at the time of this writing, it is required if you want to use the role yourself.
Deploying Containers
This is where the fun part begins. I found myself deploying containers in the same way over and over again, so I knew Ansible roles would be my friend. I was already using my tailscale_container role from Ansible Galaxy, however, since I started using Traefik, I found that I also was adding nearly the same Docker labels to every container so that it could be proxied through Traefik. I also knew that for every service, I would need an A record created in Cloudflare pointing to Traefik’s Tailscale IP. (I’ve since realized that I could more easily accomplish this with a single wildcard record, but hey, I’ve already automated this).
So, I wrote yet another role. This one is not published to Ansible Galaxy, it’s just contained within the playbook. The premise looks like this:

The below YAML is contained in a file called template.yml. Whenever I need to deploy a new service, I simply copy this file and add the necessary variables based on the comments. Some services take a little more tweaking, like ones that require a separate database or redis container, but this works as-is for most things. By simply copying a file and adding a few pieces of information, I can have a new service deployed on my Tailnet and accessible over HTTPS with a valid certificate retrieved by Traefik in a matter of a few seconds.
---
- name: Deploy {{ deploy_container_service_name }}
  hosts: "{{ deploy_container_host_group_name }}"
  vars:
    deploy_container_service_name: # Service/container name
    deploy_container_host_group_name: # Host group for container to be deployed to
    deploy_container_service_image: # Container image -- ex. louislam/uptime-kuma
    deploy_container_service_tag: # Image tag -- ex. latest
    deploy_container_service_port: # Must be quoted -- ex. "80" not 80
    deploy_container_service_scheme: # http or https
    deploy_container_forward_auth: # true or false
    deploy_container_tailnet_name: "{{ tailnet_name }}"
    deploy_container_oauth_client_secret: "{{ tailscale_containers_oauth_client['secret'] }}"
    deploy_container_domain_name: "{{ domain_name }}"
    deploy_container_cloudflare_email: "{{ cloudflare_email }}"
    deploy_container_cloudflare_api_token: "{{ cloudflare_api_token }}"
    deploy_container_volumes: # Customize or omit
      - /home/{{ ansible_user }}/{{ deploy_container_service_name }}/data:/app/data
    deploy_container_env_vars: # Customize or omit
      PUID: "1000"
      PGID: "999"
    deploy_container_labels: # Customize or omit
      - key: "nautical-backup.enable"
        value: "true"

  tasks:
    - name: Include vars
      ansible.builtin.include_vars:
        dir: "{{ root_playbook_dir }}/vars"

    - name: Deploy container
      ansible.builtin.include_role:
        name: "{{ root_playbook_dir }}/roles/deploy_container"
...
Adding Authentication
Once I’ve adequately tested a service and decided to keep it around, the next thing I do is add authentication to it with Authentik. I can do this in one of two ways: by using the app’s native support for OAuth/OIDC or, in the case that the app doesn’t have this support, by using a forward-auth header in Traefik.
You’ll notice a variable in the above template – deploy_container_forward_auth – which can be set to true or false. If set to true, this will tell the role to add the necessary traefik labels for redirecting users to my Authentik instance for authentication prior to reaching the service itself. If the app supports OIDC, I will leave this set to false and follow the app’s documentation for setting up OIDC with Authentik.
In either case, there are a few quick configuration changes that need to happen in the Authentik dashboard after the app is deployed. I won’t cover these in detail here – I may in another dedicated post. However, this YouTube channel has a bunch of fantastic tutorials on Authentik which I used to get my setup working.
End Result
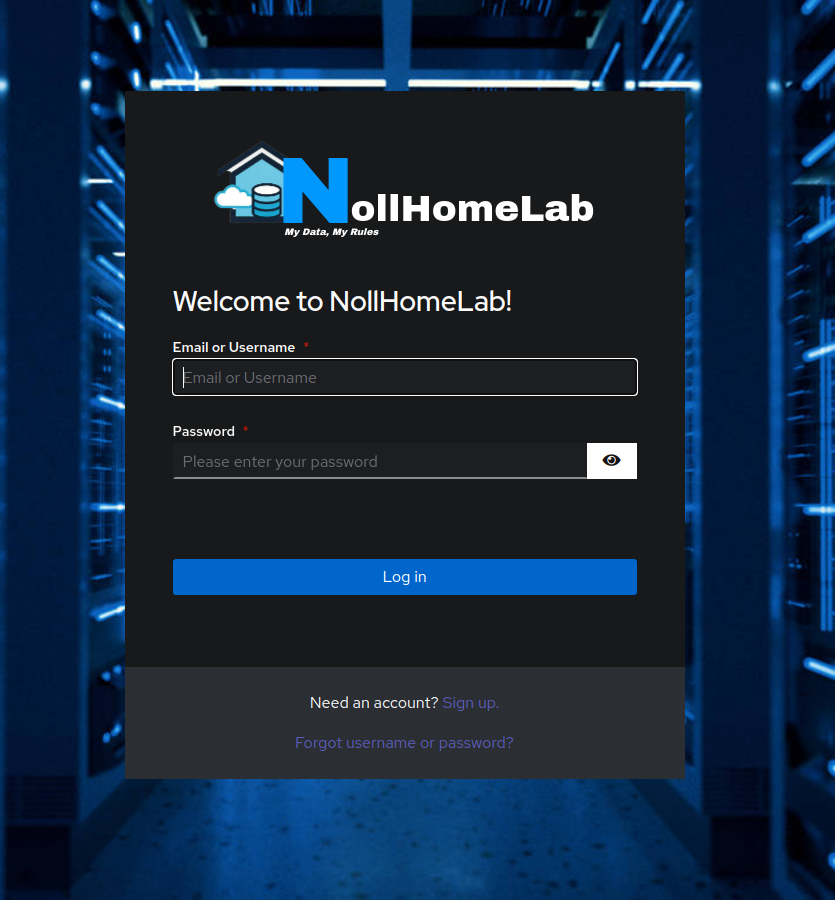
After the playbook for a service is ran and I’ve made the necessary configurations in Authentik, I’m able to reach the service at https://service-name.mydomain.com with valid HTTPS certificates over Tailscale. I have no ports opened in my firewall and nothing is exposed to the internet. If you aren’t on my Tailnet, or don’t have my Traefik instance shared with you over Tailscale, then the connection fails.
If the connection is successful, you are greeted with my custom login from Authentik. If you don’t have an account, you can’t get in. If you have an account, but I haven’t given your account access to the service in Authentik, then you’ll receive an access denied message.
Conclusion
I have a love-hate relationship with the way I’m managing my homelab currently. It’s definitely not the best way to do things, particularly with provisioning VMs. There are better tools for the job. However, I’ve learned a lot about Linux, Docker and Ansible in the process of making this thing.
In the future, I plan to move to a CI/CD pipeline with Gitea or Github actions which will keep certain elements of what I’ve built in this playbook for managing the VMs and servers. I’ll move the VM creation to Terraform as well.
Lately, I’ve also dug into learning Kubernetes and plan to migrate my services to a Talos cluster and deploy them via a GitOps tool like Flux, or ArgoCD.