Introduction
If you look into homelabbing or self-hosting online, you’re sure to come across Home Assistant. It’s an open source service, which you can self-host in a variety of different ways, that brings all of your IoT devices under one roof.
If you have multiple smart devices from multiple vendors, then you probably have multiple different ways of controlling them. You might control your smart light bulbs with one app, your smart Christmas lights have another, the smart plugs have yet another, some devices have their own dedicated bridge devices like the philips hue bridge while others don’t, and your home security system has yet another dedicated app for controlling the system.
Well, Home Assistant will not only will bring all of these devices into one administrative dashboard, but it will also allow you to create automations: triggering actions in one device based on the status of another in a way that wasn’t possible before.
The Home Assistant project has come a long way in the past few years and is constantly adding improvements. The community is constantly adding integrations as well. I’m excited to finally be a part of the home automation club!
What follows is an account of my planning, installing and configuring my Home Assistant server.
Planning
Now, Home Assistant has many installation methods. One of which is via a Docker container. I was initially drawn to this as this is how I deploy most services in my homelab and it would allow me to deploy a Tailscale container along with it just as I do with everything else (for more info on how I do this, see this github repo.).
However, I realized that this likely wouldn’t work for Home Assistant because it requires local access to your IoT devices. I could have achieved this through a Tailscale subnet router, however this still wouldn’t allow for device auto-discovery because that function relies on Home Assistant residing on the same subnet as the IoT devices.
The other option was Home Assistant OS. This means an entire operating system that just runs Home Assistant. No Ubuntu, no Docker, no nonsense. It hurt my soul a bit, being a mega nerd and all, because this felt like the easy button. But I ultimately figured this would be the best route since it has a built-in backup function and can run automatic updates.
The Hardware
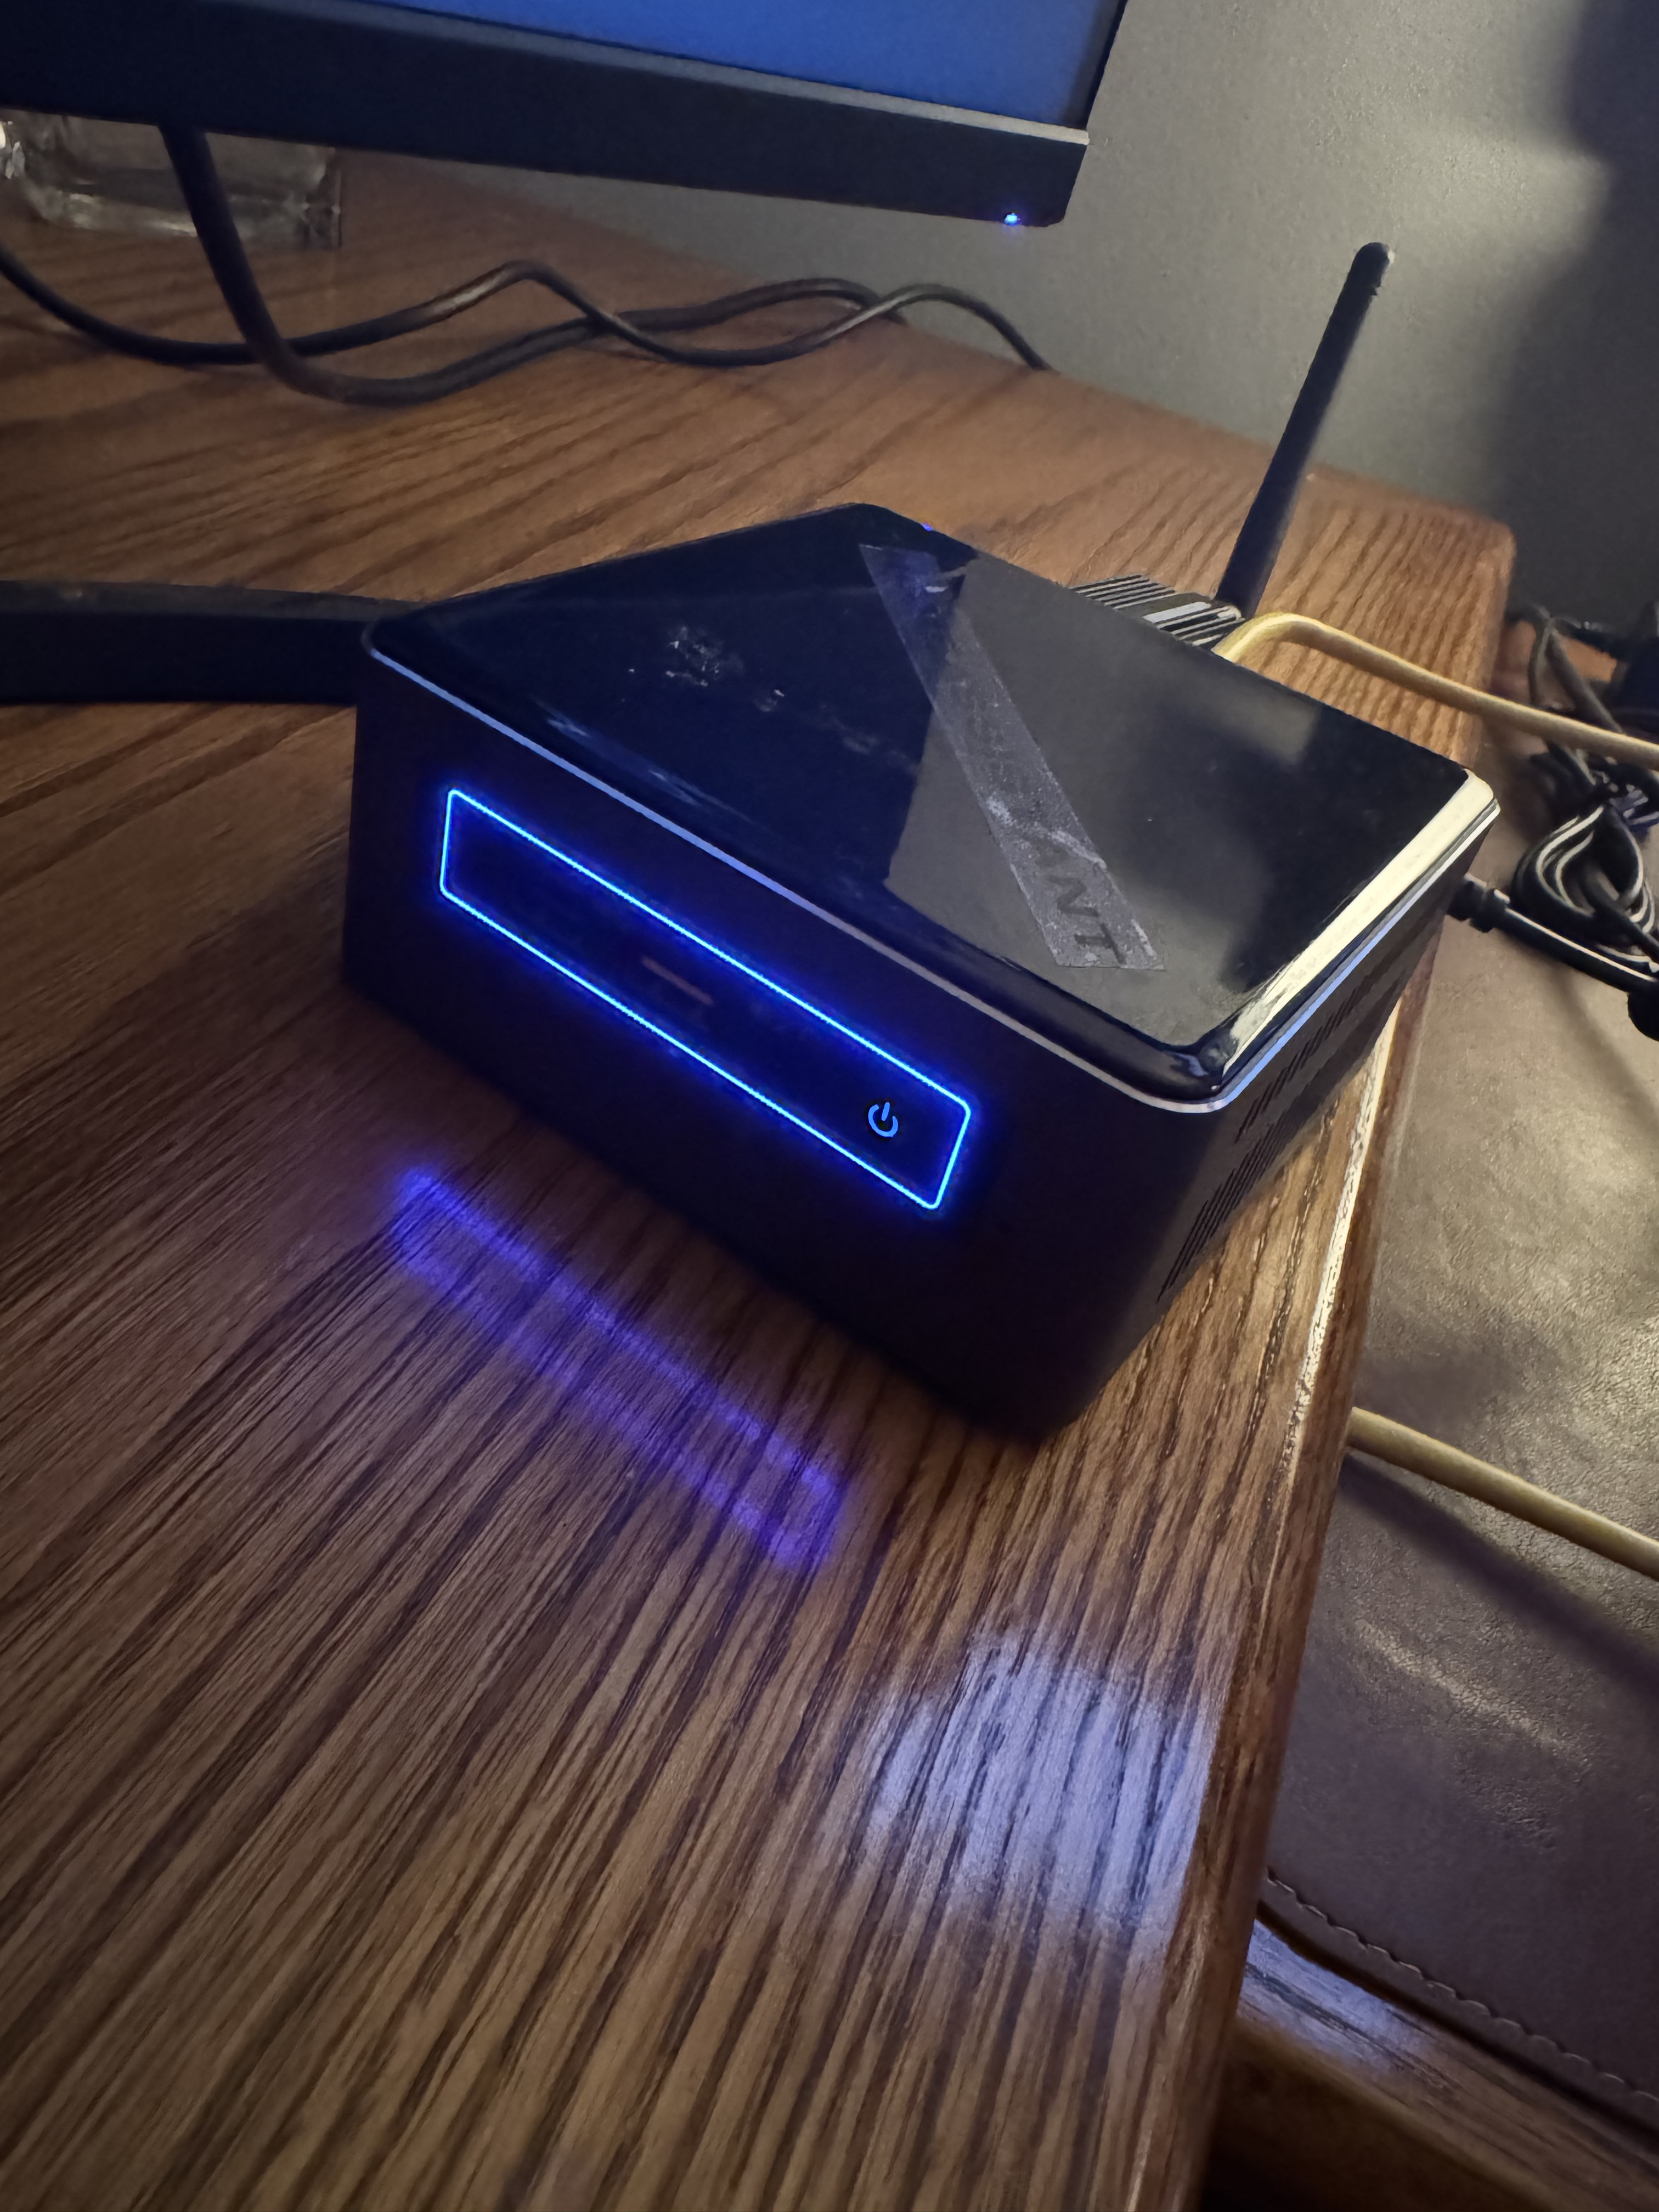
The hardware that I used is an old Intel NUC that a friend gave me for free. It has a 7th gen i7 and 16GB of DDR4 RAM. The SSD is only 120GB, but I figured if I end up running anything that requires large amounts of storage, I would use a network share from my NAS anyway.
Why not a VM?
Well, for one, because I have the NUC and didn’t have a better use for it. For two, Home Assistant seemed to me like one of those services with the potential to significantly blur the line between homelab and production. If my family and I begin relying on this service to turn our lights on/off and arm our home security system, I felt better about it being on a bare metal machine. This reduces the variables involved when troubleshooting it if it isn’t working, and also eliminates the risk of erroneously deleting the VM disk (or the entire VM itself).
The Networking
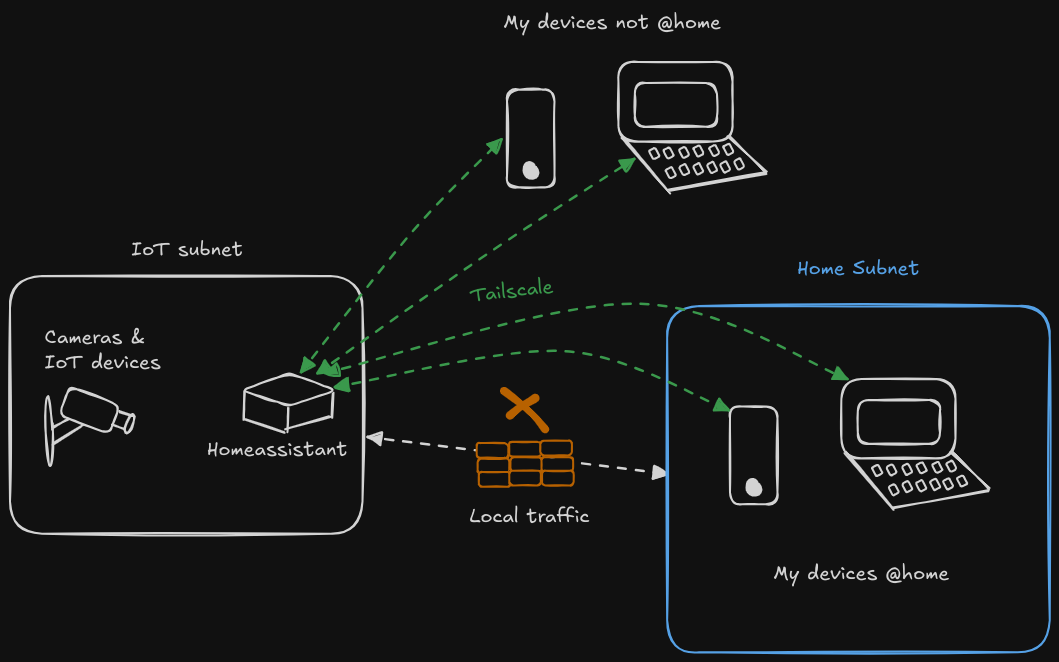
After determining that my usual way of running services in my homelab doesn’t jive with Home Assistant, I had to decide what subnet to put it on. I have all of my IoT devices on a separate, isolated subnet, which means that if I put Home Assistant on the usual server subnet, it wouldn’t be able to auto-discover my devices. However, if I put it on the IoT subnet, I wouldn’t be able to access the Home Assistant server by its local IP with out opening the respective port between the IoT subnet and Home subnet.
I ultimately decided to let Home Assistant live on the IoT subnet and opened the port temporarily for setup. Once I got Tailscale set up, I was able to close the port back up and access Home Assistant exclusively through Tailscale. Here’s a picture for the visual learners like myself:
Installing
Home Assistant has some great documentation overall. Including their installation docs. I navigated to the section on installing on x86-64 hardware, which conveniently provides an example of using an intel NUC (the exact hardware that I’m using).
The Wrong Way
Unfortunately, I did the same thing I often do when assembling furniture… I didn’t read the instructions. I figured “I’ve done this before, I got it.” so, I fired up Balena Etcher and quickly scrolled down until I saw a “download the image” link.
The image is a *.img.xz file rather than an ISO file, which should have been my first hint that I should probably read the instructions. But, nevertheless I flashed that image to a usb drive and booted my NUC to it expecting to be greeted with an installer.
Well, here’s the thing. Home Assistant doesn’t have an interactive installer. If you’ve ever installed another linux OS (or any OS for that matter), you’ve probably done this exact same process before. Boot to a USB, select next a few times, select your target boot drives, do any custom drive formatting, and finally click install. Well, unfortunately, HA doesn’t have this for some reason (not sure why… I think it would be really helpful if they did). So, booting to this USB was simply booting me directly into HA, off of the USB drive, which is not what I wanted.
The Right Way
So, going back to the instructions, I realized the correct process. Flash a USB drive with Ubuntu Desktop, select the ’try Ubuntu’ option rather than going through with the install, and use Ubuntu’s disk utility to format your target drive with the HA image.
In my first attempt, I simply grabbed the latest Ubuntu version. At the time of writing, this is Ubuntu 24.04. In following the install instructions exactly, I got stuck on step 7 when restoring the disk image. No matter what I tried, I would get a pop-up telling me that the device or resource was busy. I even dded the entire drive to ensure there was nothing on it that the Ubuntu USB could be mounting or using.
After sleeping on it, I decided to simply try another version of Ubuntu – 22.04. This did the trick. There may have been something simple I was missing, but hopefully this helps someone who stumbles across this while trying to install Home Assistant.
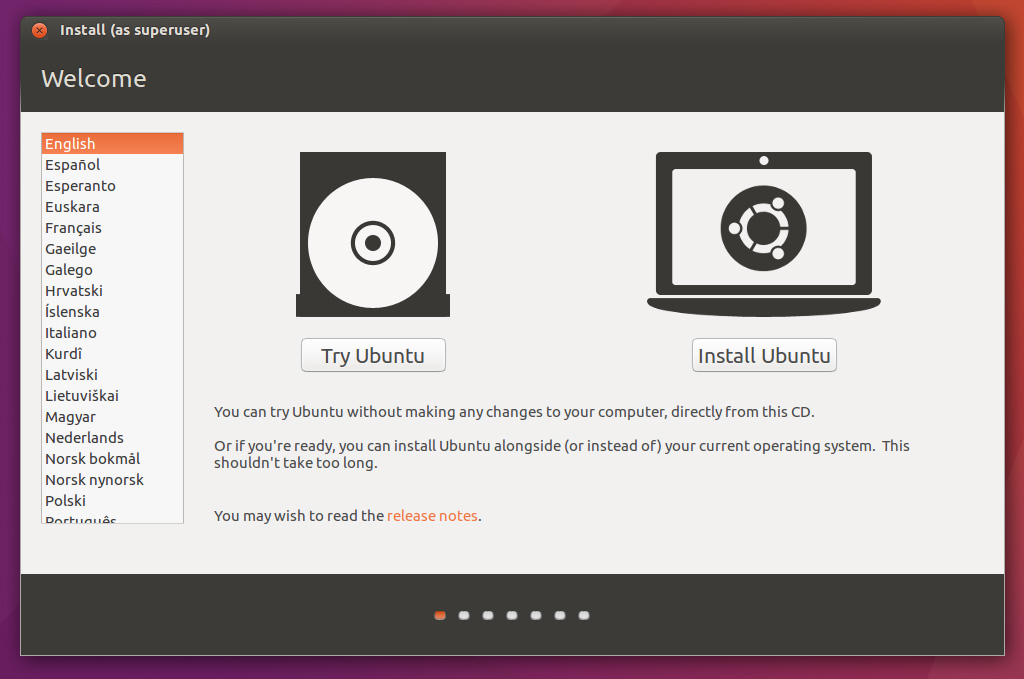
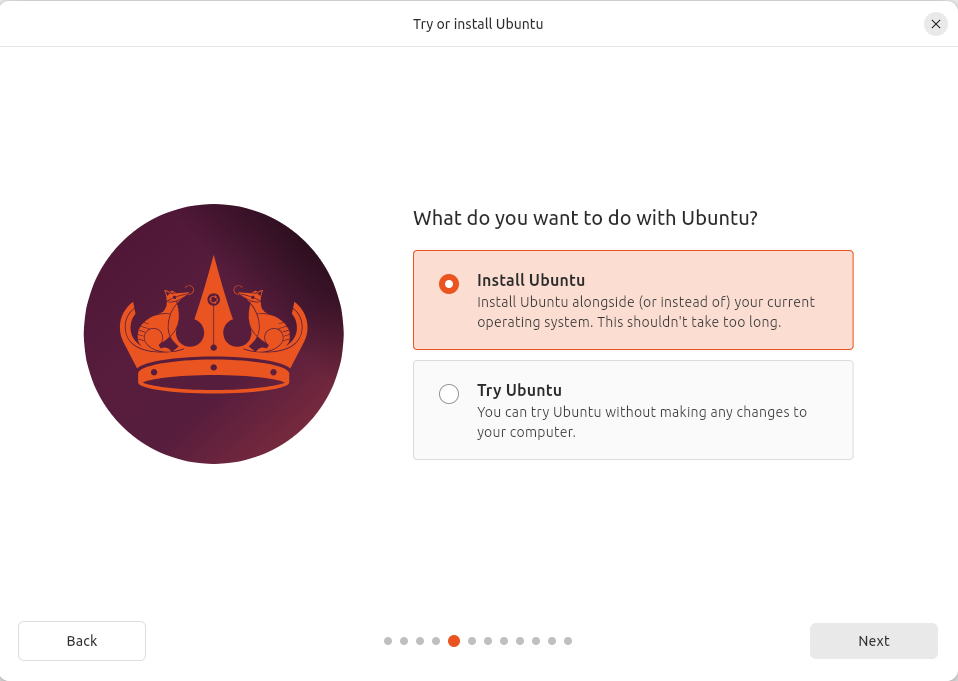
The image on the left is what you will see in the Ubuntu 22.04 installer (the one that worked), and the image on the right is the Ubuntu 24.04 installer which did not work.
Initial Set-Up
Since HA sits on my IoT subnet; it isn’t on the same subnet as my computer. So, the given http://homeassistant.local:8123 url didn’t work for me. I had to use http://ip-of-home-assistant:8123 (after opening port 8123 between the IoT subnet and the Home subnet that my computer is on).
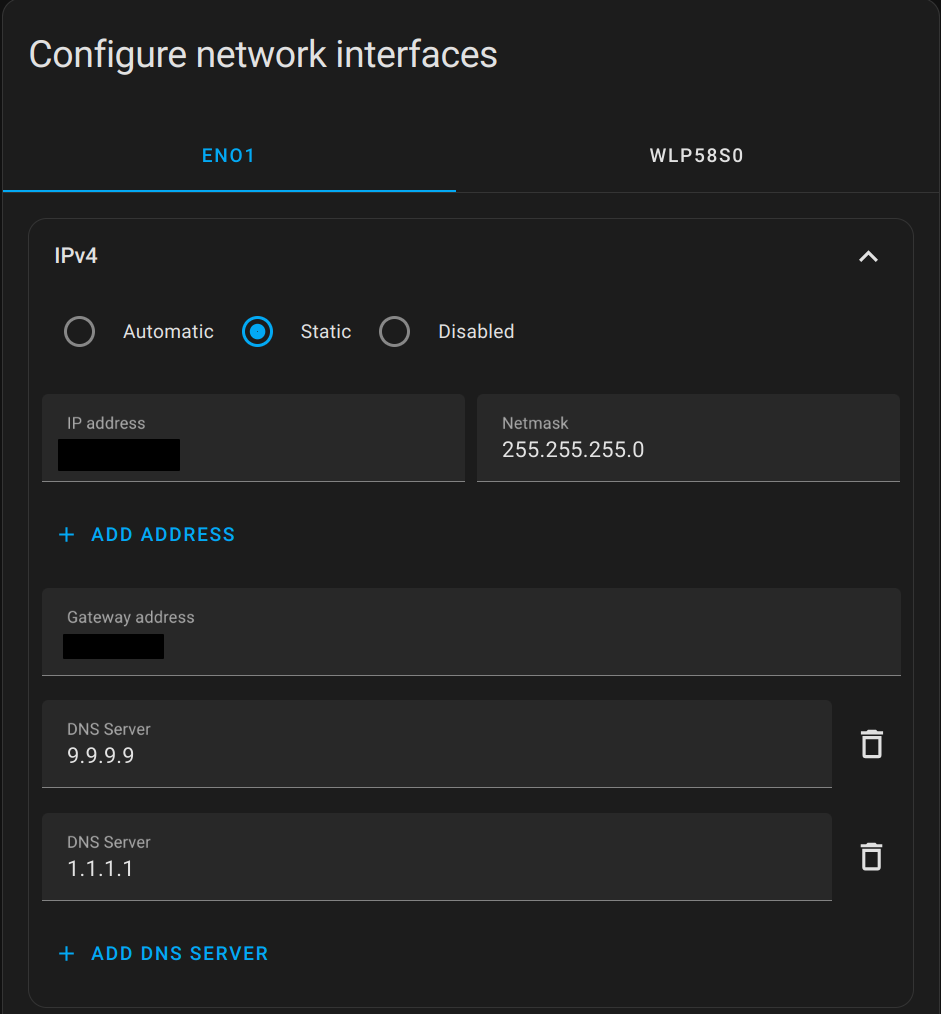
I knew I would want to provide my HA instance a static IP. After creating an admin account, I navigated to Settings –> System –> Network. Here, under the Configure network interfaces section, you can statically assign an IP address to your Home Assistant instance. Once you click save your connection will stop working; you’ll need to adjust the URL that you’re connecting to by changing it to Home Assistant’s new IP address.
I would recommend doing this as a first step regardless of whether you can resolve homeassistant.local or not. It’s always better for a server to have a static IP so that a DHCP lease renewal doesn’t cause a change in it’s IP which could lead to service interruptions and frustrating hours of troubleshooting.
Installing Tailscale
You already know the next thing I needed to do was get Home Assistant up on my Tailnet. This will allow me to access my Home Assistant server from anywhere, at any time, from any device that’s on my Tailnet (even if I’m not at home).
Why would you need to access it when you’re not at home?
Well, the Home Assistant iOS and android apps allow you to share your phone’s location data with your server. This allows you to set up automations which are triggered when you get home, when you leave home, etc. For instance, when I get home, I want an automation that unlocks the doors, and turns the lights on.
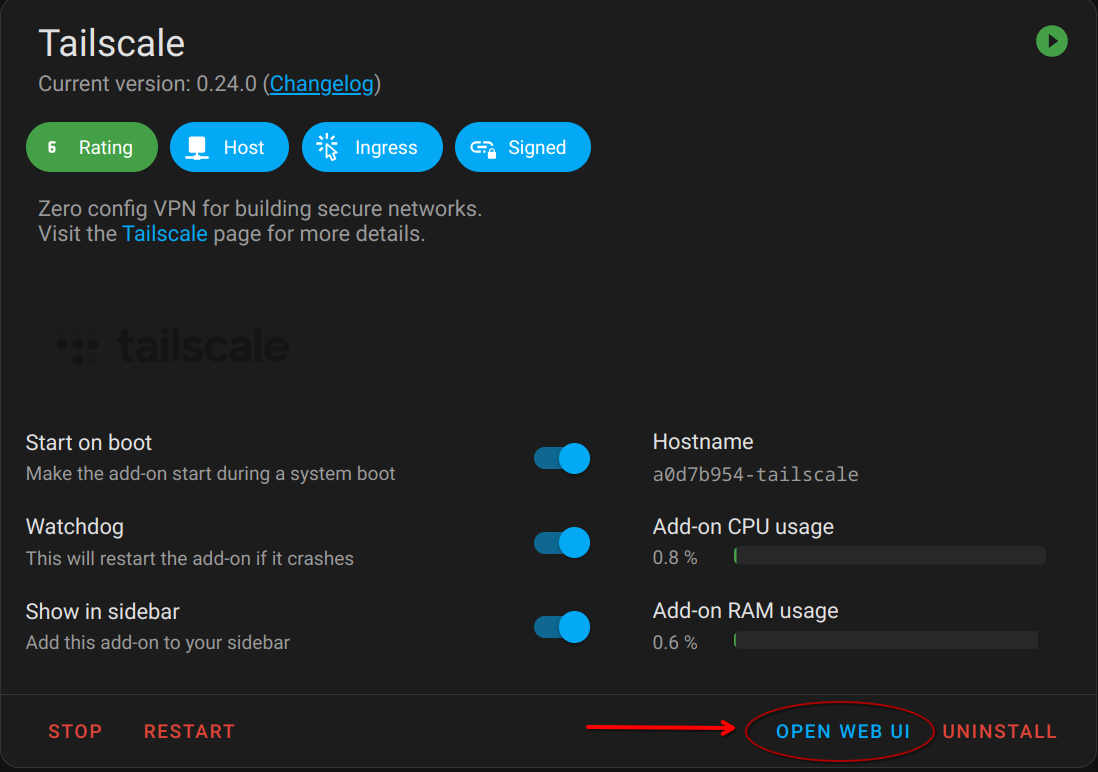
Tailscale on Home Assistant is installed through an Add-On:
After logging in, I navigated to Settings –> Add-Ons. I clicked on the Add-On Store in the bottom right corner and installed the Tailscale add-on. This installation is seamless. Once installed you can click on the Open Web UI button to authenticate into your tailnet.
Adjusting the Tailscale Configuration
There seemed to be some funky defaults to the configuration… I noticed that Home Assistant advertised itself as a subnet router and an exit node by default. I didn’t want my HA instance doing either of these, so I opened the Configuration tab of the add-on, but both of these options were already deselected. I had to play around with removing HA from the tailnet and restarting the add-on with, and then again without these options selected in order to get my desired state.

One configuration that I did want on my Tailscale configuration was the Tailscale serve feature. This would allow my HA instance to accept incoming requests from https://homeassistant.my-tailnet.ts.net rather than http://tailscale-ip:8123.
Confusingly, the Home Assistant add-on calls this feature Tailscale Proxy rather than Tailscale Serve. Turning it on is simple enough. However, once I made the change I was not able to reach my instance via the expected URL. Turns out, it’s because I, once again, did not read the instructions.

After some digging, I realized that I never properly read the “Documentation” tab of the add-on. Enabling this feature requires adding the following to your Home Assistant configuration:
http:
  use_x_forwarded_for: true
  trusted_proxies:
    - 127.0.0.1
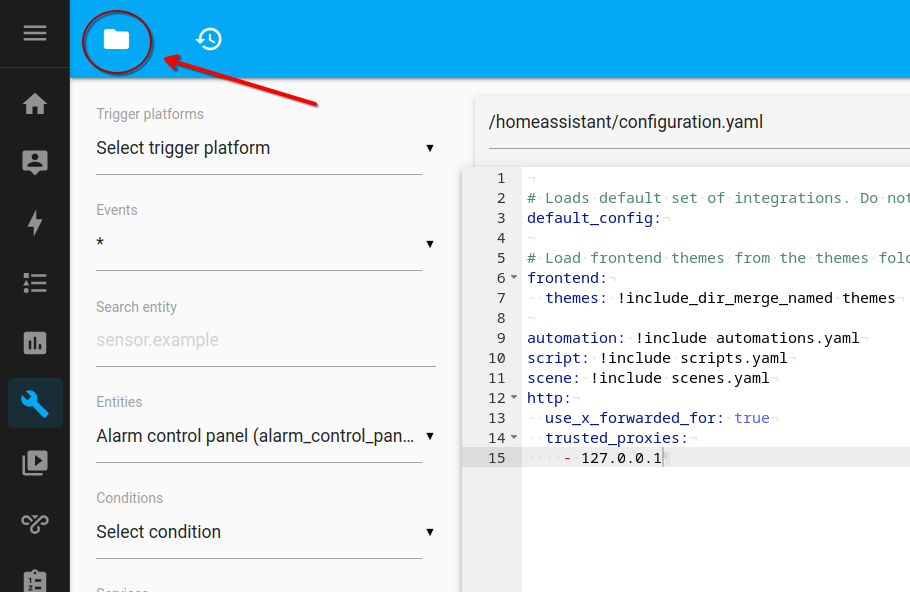
To do this, you’ll need yet another add-on (if you don’t already have it) – File editor. Once you have it installed you should see a wrench icon in the dock on the left side. Clicking on it will open the file editor and in the top left there should be a file button that will allow you to browse for your configuration file.
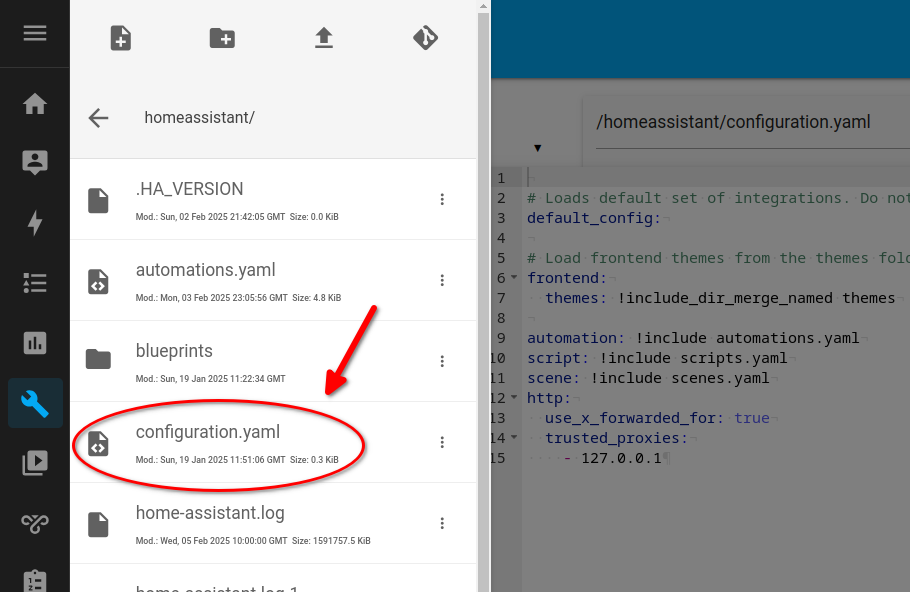
Once this change was made, I restarted the Tailscale add-on and was able to reach my instance from the correct URL with a valid HTTPS certificate.
Backups
Finally, I knew I would want to get backups running on my instance. To do this you can go to Settings –> System –> Backups and select configure automatic backups. You’ll be prompted with an encryption key. I recommend that you save this in a password manager.
Setting up remote storage
Additionally, I didn’t want the backups being saved to the local machine’s disk. This wouldn’t do me any good if the machine’s disk got corrupt or failed. I wanted the backups saved remotely on my TrueNAS system.
To do this you’ll first need to set up the network storage system-wide in settings. Go to Settings –> System –> Storage click add network storage.
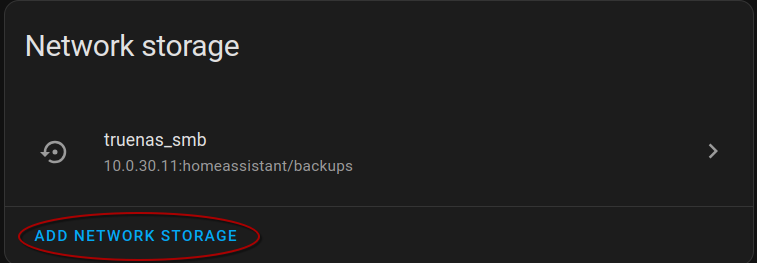
Enter the information for your network share and click save. Keep in mind the name that you provide for the storage is how you will reference it later, and from what I can tell it cannot be changed.
Then, go back to Settings –> Backups –> Settings and history. Under the Locations section, ensure you select the remote storage target that you just configured. If you don’t see it as an option here, you may have fudged the previous step.
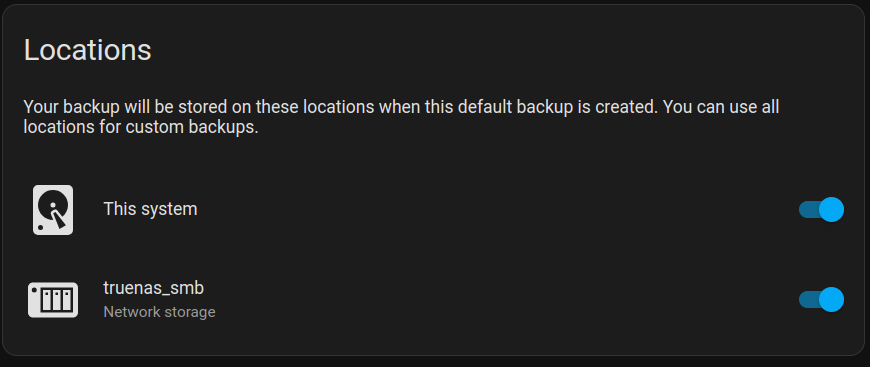
Conclusion
At this point I was ready to start playing with Home Assistant. The auto-discovery of my devices has been seamless, and the app on my phone works great over Tailscale. Covering my automations and dashboard is deserving of its own write-up, so I will save that for a later post. For now, I’ll just say that there is a LOT that Home Assistant can do. If you’re interested in it, definitely give it a shot. Hopefully this post helps you in your setup.
Additionally, if you think you don’t have any IoT devices… give it a shot anyway. My Home Assistant’s auto-discovery found devices that I didn’t even previously consider to be IoT, like my printer and smart TVs.