Introduction
With my clusters up and running, I’m well on my way to running my homelab as code. The first thing I’ll need to do is get some kind of persistent storage set up.
But why though?
Stateless vs. Stateful Applications
Some applications are stateless and don’t require any persistent storage. Things like static websites can have all of their data containerized. When the container (or pod) is destroyed and rebuilt, the end user is none the wiser because the service isn’t relying on any data that was modified by the end user. They’re just viewing and/or interacting with the contents of the static website. They’re not uploading data and they’re not making configuration changes to the application.
Take the website you’re reading this post on. You are passively viewing the information contained in this website. There is no database that stores any information and there are no configurations for you to change as the end user. If this website’s data were reset back to the state it was in when it was last deployed, you would be none the wiser.
Contrast that with stateful applications (of which many homelab services are). Stateful applications store some kind of data that needs to persist beyond the lifetime of the pod(s)/container(s)/servers that run them.
For example, something like Uptime Kuma, which runs a SQLite database within one of its volumes. When you log in to Uptime Kuma for the first time and create an admin account, that account is stored in this SQLite database.
When running Uptime Kuma on Docker, this volume is generally correlated to a folder on the host system via a bind mount. Deleting and recreating the container does not cause any data loss because the data persists in this folder. If the container were misconfigured (ie. you forgot to add the bind mount), then you would have data loss when the container was recreated, because that volume has been reset back to square one.
So how do we replicate this in Kubernetes?
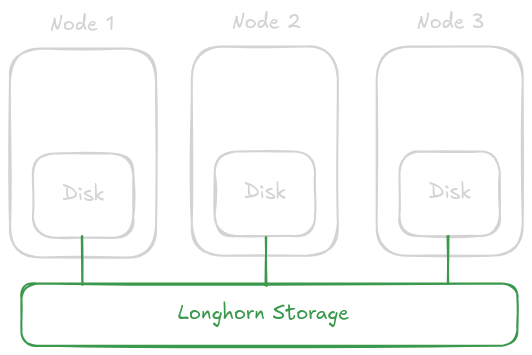
The short answer is – with Persistent Volumes. But what is the best way to run your persistent volumes? Well, there are an overwhelming amount of options. From hostPath, to NFS/SMB shares, or even cloud storage. The popular option I settled on, was Longhorn.
Longhorn effectively takes all of the disks running in your cluster and presents them as one. A volume can be created on Longhorn and it will be accessible to pods running anywhere in the cluster. This eliminates the shortcoming of a hostPath (similar to a Docker bind mount) which can only be accessed by pods running on the same node. It is also less prone to file locking, a shortcoming of NFS/SMB shares, which I’ve found causes issues with starting SQLite databases.
Top that off with the benefit of Longhorn’s built-in snapshotting and backup features, and a clean GUI for visibility and management over all of your storage, and you’ve got yourself a great option for persistent storage!
Steps
The steps I took to install Longhorn are nearly identical to what is provided in Longhorn’s documentation, with one minor addition that makes the setup work on Talos linux.
Create Longhorn Namespace and Add Pod Security Labels
The first thing we’ll need to do is create a namespace called longhorn-system. You’ll notice in Longhorn’s docs that this is actually step 3. It doesn’t really matter as long as you do this before running helm install.
Now, most of the longhorn-system will need privileged access (since it’s managing disks on the host). Talos has a default pod security policy which prevents pods from running in privileged mode by default. So, we need to add a label to the longhorn-system namespace which allows pods to run in privileged mode. I’m sure there is a more security-centric way of doing this which would allow the Longhorn pods privileged access to only what they need access to. But, for now, this is how I got it working:
kubectl create namespace longhorn-system && kubectl label namespace longhorn-system pod-security.kubernetes.io/enforce=privileged
Customize the Install with values.yaml
Now, we need to customize our install through the values we will pass to helm. Technically, this can be done through command-line argument --set when running helm install, but it’s much easier to add your values to a file and pass them with the --values=values.yaml argument.
Create a file called values.yaml and add the following contents:
# values.yaml
defaultSettings:
  defaultReplicaCount: 1
persistence:
  reclaimPolicy: Retain
  defaultClassReplicaCount: 1
Two of these settings are unique to my single-node staging cluster, and one is a personal preference.
defaultReplicaCount
This setting tells longhorn to only use one replica when creating volumes. The default is three. Without this setting, on a single-node cluster, volumes will fail to create because there aren’t enough nodes available to create the minimum amount of replicas.
reclaimPolicy
This is a personal preference. This defaults to Delete which means that when a Longhorn PersistentVolumeClaim (PVC) is deleted, the associated volume (and therefore all of your data) is also deleted. I prefer to set this to Retain which will leave the Longhorn volume alone and allow me to either re-associate it with a new PVC, or manually delete it later. This allows some flexibility in case I were to erroneously delete a PVC that shouldn’t have been deleted. But, it does come with additional administrative overhead. YMMV.
defaultClassReplicaCount
Same as defaultReplicaCount but for the Longhorn storage class.
Add the Longhorn Helm Repo and Install Longhorn
With our values.yaml file created, we can add the Longhorn helm repo:
helm repo add longhorn https://charts.longhorn.io && helm repo update
And, finally, install Longhorn:
helm install longhorn longhorn/longhorn --namespace longhorn-system --values=values.yaml
After a few minutes, you should see all of the longhorn pods deployed:
kubectl -n longhorn-system get pod
NAME                                                READY   STATUS    RESTARTS   AGE
longhorn-ui-b7c844b49-w25g5                         1/1     Running   0          2m41s
longhorn-manager-pzgsp                              1/1     Running   0          2m41s
longhorn-driver-deployer-6bd59c9f76-lqczw           1/1     Running   0          2m41s
longhorn-csi-plugin-mbwqz                           2/2     Running   0          100s
csi-snapshotter-588457fcdf-22bqp                    1/1     Running   0          100s
csi-snapshotter-588457fcdf-2wd6g                    1/1     Running   0          100s
csi-provisioner-869bdc4b79-mzrwf                    1/1     Running   0          101s
csi-provisioner-869bdc4b79-klgfm                    1/1     Running   0          101s
csi-resizer-6d8cf5f99f-fd2ck                        1/1     Running   0          101s
csi-provisioner-869bdc4b79-j46rx                    1/1     Running   0          101s
csi-snapshotter-588457fcdf-bvjdt                    1/1     Running   0          100s
csi-resizer-6d8cf5f99f-68cw7                        1/1     Running   0          101s
csi-attacher-7bf4b7f996-df8v6                       1/1     Running   0          101s
csi-attacher-7bf4b7f996-g9cwc                       1/1     Running   0          101s
csi-attacher-7bf4b7f996-8l9sw                       1/1     Running   0          101s
csi-resizer-6d8cf5f99f-smdjw                        1/1     Running   0          101s
instance-manager-b34d5db1fe1e2d52bcfb308be3166cfc   1/1     Running   0          114s
engine-image-ei-df38d2e5-cv6nc
Access the Longhorn UI
Now, eventually, I will create an ingress object for the Longhorn UI and build in some authentication using Traefik and Tailscale, which I haven’t installed yet. For now, we can use the kubectl port-forward utility to verify that the Longhorn UI is up and running:
kubectl port-forward service/longhorn-frontend 8080:80 -n longhorn-system
This will allow you to access the UI from http://localhost:8080
This command will run in the foreground by default, so it might be easiest to open a second terminal window for it.
Note: It took me a second to realize this… This does NOT forward the port on the Kubernetes node. From your local system (ie. the laptop or desktop you’re running kubectl on), kubectl is doing all the work and forwarding you on to the longhorn service which is, otherwise, only accessible from inside the cluster.
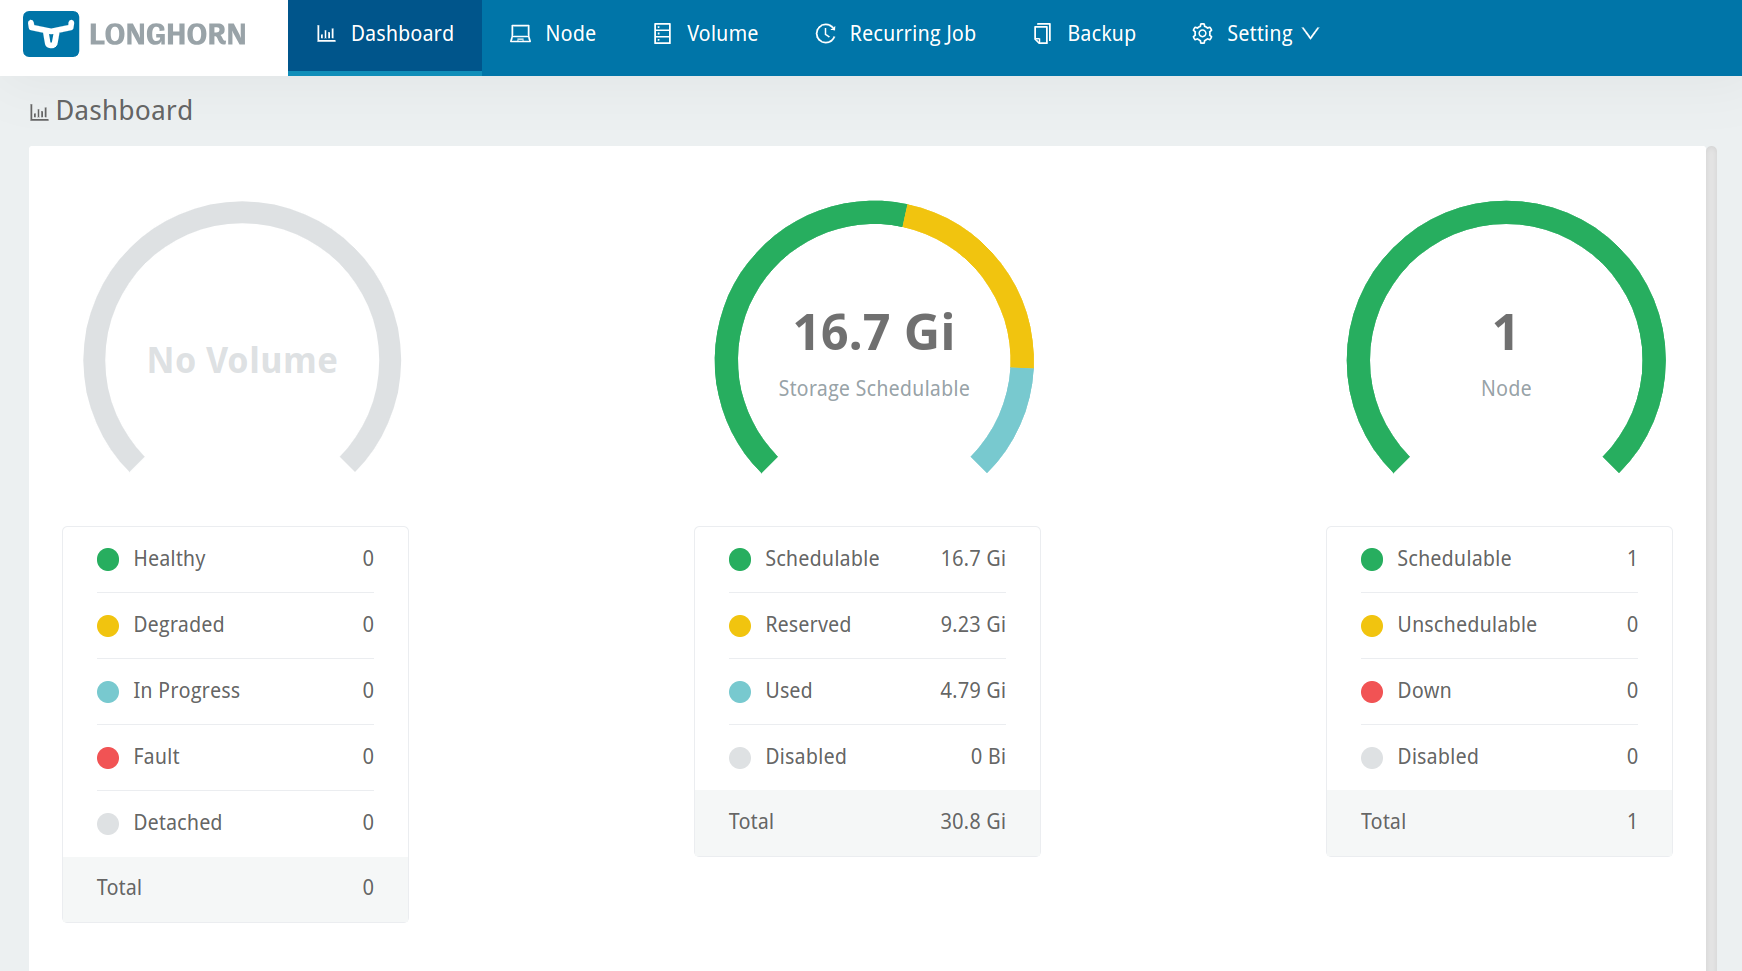
The UI should look like this:
Creating a Deployment that Uses Longhorn
With Longhorn finally installed, let’s deploy some stuff that uses it for storage.
Dynamic Provisioning
The easiest way to create longhorn volumes is to let it happen automatically. Take the following Uptime-Kuma deployment as an example:
Deployment
---
apiVersion: v1
kind: Service
metadata:
  name: uptime-kuma-service
spec:
  selector:
    app: uptime-kuma
  type: ClusterIP
  ports:
    - protocol: TCP
      port: 3001
      targetPort: 3001
---
apiVersion: apps/v1
kind: Deployment
metadata:
  name: uptime-kuma
  labels:
    app: uptime-kuma
spec:
  replicas: 1
  selector:
    matchLabels:
      app: uptime-kuma
  template:
    metadata:
      labels:
        app: uptime-kuma
    spec:
      containers:
      - name: uptime-kuma
        image: louislam/uptime-kuma
        ports:
        - containerPort: 3001
        volumeMounts: # Volume must be created along with volumeMount (see next below)
        - name: uptime-kuma-data
          mountPath: /app/data # Path within the container, like the right side of a docker bind mount -- /tmp/data:/app/data
      volumes: # Defines a volume that uses an existing PVC (see next below)
      - name: uptime-kuma-data
        persistentVolumeClaim:
          claimName: uptime-kuma-pvc
---
apiVersion: v1
kind: PersistentVolumeClaim
metadata:
  name: uptime-kuma-pvc
spec:
  accessModes:
    - ReadWriteOnce
  resources:
    requests:
      storage: 1Gi
  storageClassName: longhorn # https://kubernetes.io/docs/concepts/storage/storage-classes/#default-storageclass
Note: Uptime-Kuma is actually a stateful application when deployed this way because it uses a SQLite database within one of its volumes. So, this should actually be deployed as a StatefulSet. However, in my testing, the Uptime-Kuma webpage fails to connect to the web socket when deployed as a StatefulSet.
All this to say, I don’t recommend the above example for actually deploying Uptime-Kuma, but it works as an example of dynamically provisioned volumes.
You’ll notice at the end of this manifest, we have defined a PersistentVolumeClaim (PVC). This normally would attach to a volume (defined separately), but in our case we’re using a StorageClass.
A storage class dynamically provisions the volumes based on the claim made in the PVC. In this case, we’re using the Longhorn storage class and requesting a 1Gi reservation. Longhorn will dynamically provision the volume and it will display in the Longhorn UI shortly after applying the manifest. Let’s give it a shot. Assuming you’ve named the above file uptime-kuma.yaml:
kubectl apply -f uptime-kuma.yaml
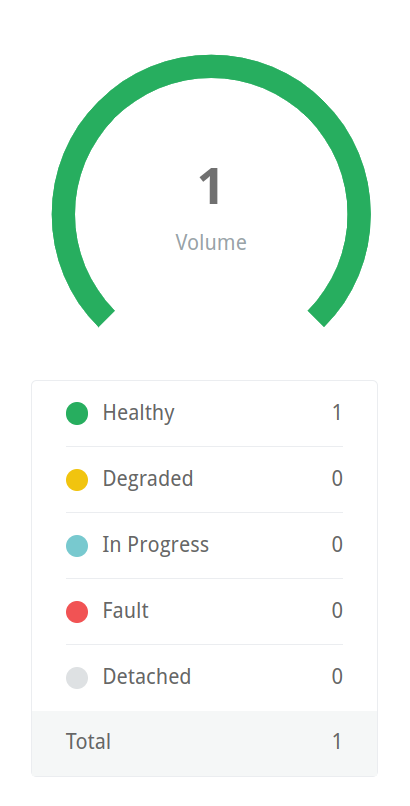
Now, let’s take a look at the Longhorn UI. We’ll see that a volume has been automatically provisioned from the dashboard. Clicking on the volume graphic from the dashboard will bring you to a filtered list of all volumes in the cluster where you can inspect their details, conduct snapshots and configure backups.
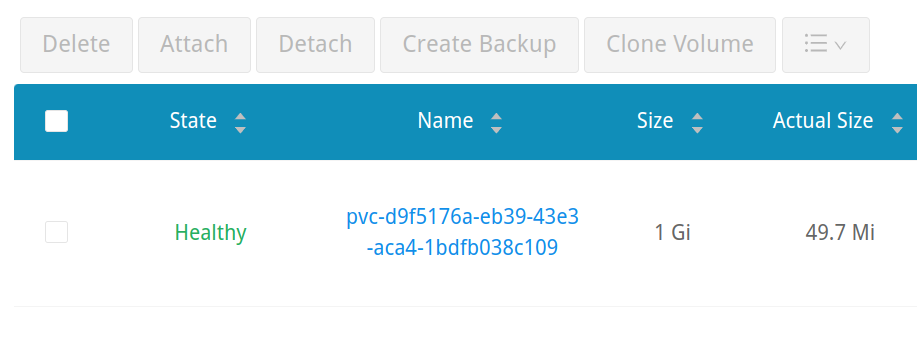
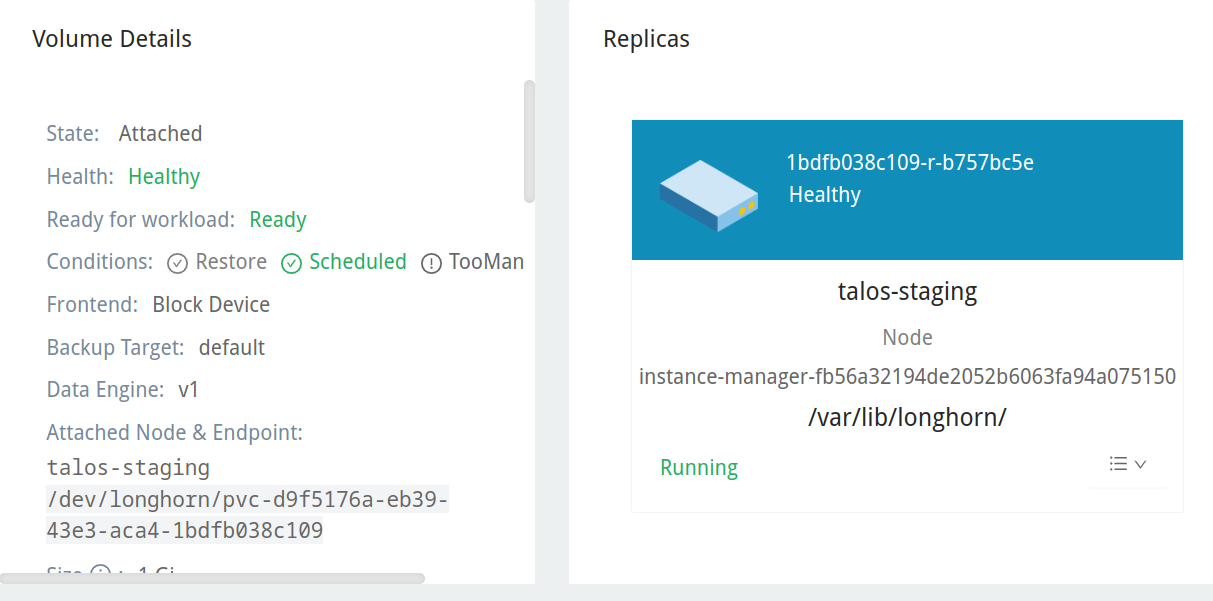
Now, let’s delete the deployment (and, subsequently, the PVC since they are defined in the same manifest file) and see what happens:
kubectl delete -f uptime-kuma.yaml
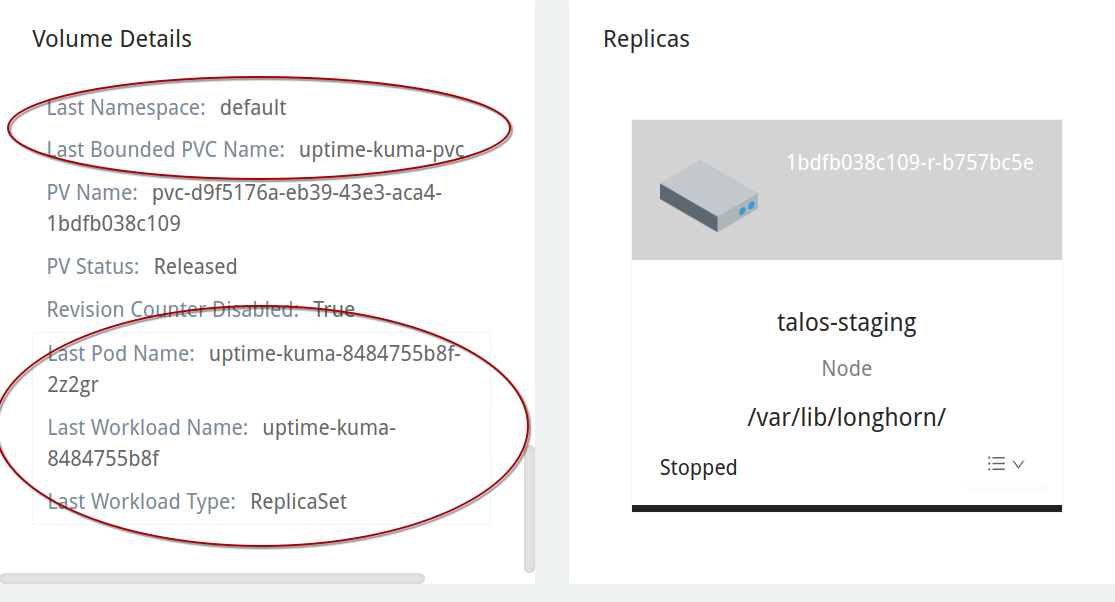
Going back to the Longhorn UI, we’ll see that the volume is now orphaned, or in a detached state. This is a product of our customized Longhorn install – setting the retention policy to Retain rather than Delete. If we had kept the default of Delete, this volume would simply disappear. This may be advantageous to reduce administrative overhead, but it also means that a kubectl delete command can completely wipe your data.
If we inspect the volume’s details we can see the last PVC it was bound to, along with the namespace and workload details.
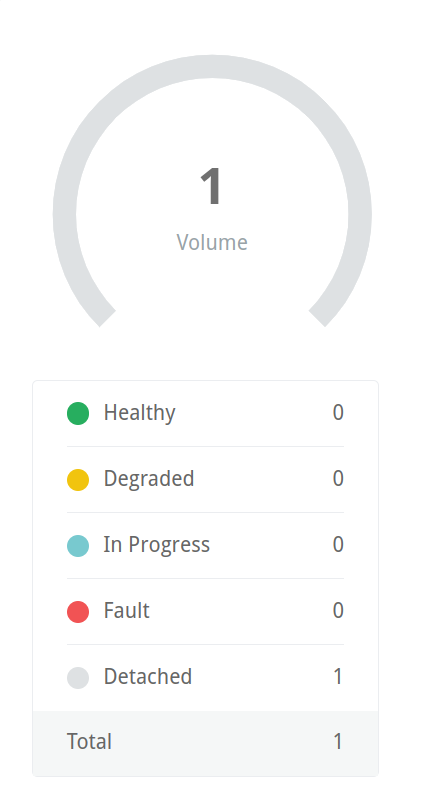
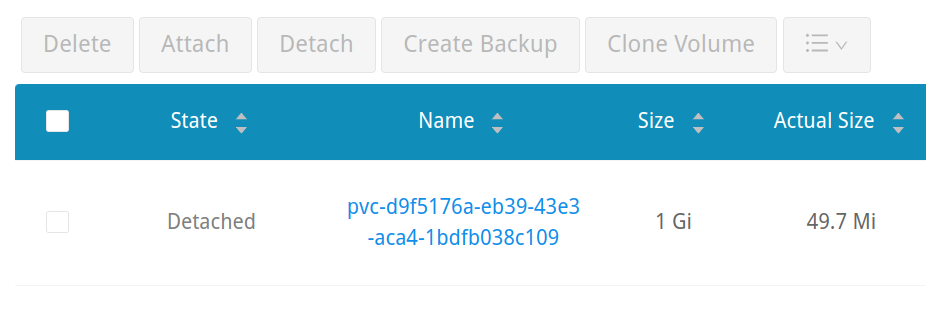
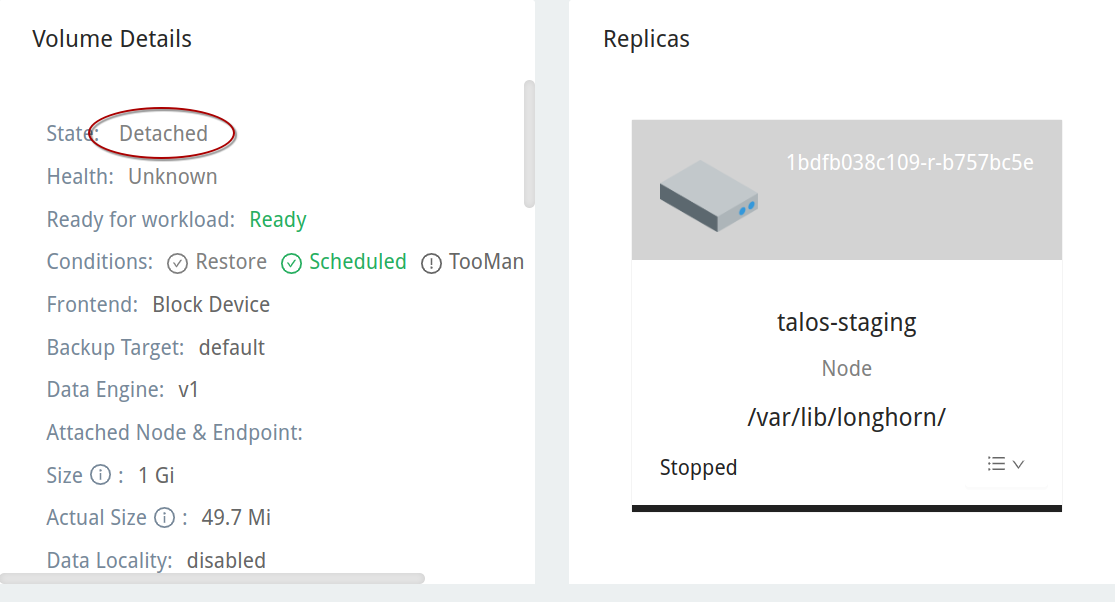
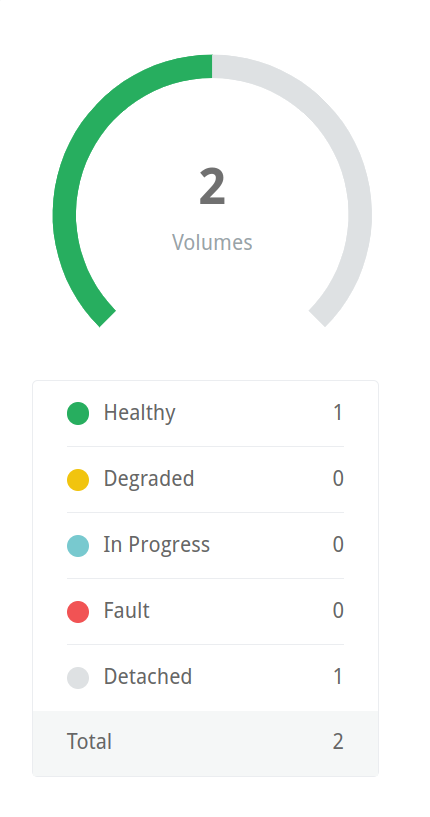
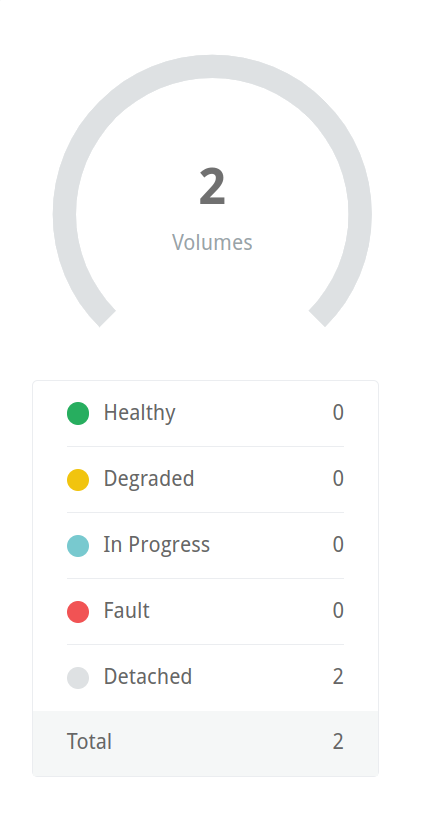
If we simply re-apply our manifest, we’ll end up creating a new PVC and, subsequently, a new volume in Longhorn, leaving us with one that is detached and one that is bound. Deleting the manifest again will leave us with two detached volumes:
Re-Attaching a Volume
If we wanted to re-deploy uptime-kuma using the same volume, rather than dynamically provisioning a new one, we’ll have to first remove the UID from the resource using kubectl. This will allow it to attach to the newly created PVC which will have a new UID:
kubectl edit pv <pv-name-from-longhorn-ui>
This will bring up a YAML file in your default editor. It should look like this:
# Please edit the object below. Lines beginning with a '#' will be ignored,
# and an empty file will abort the edit. If an error occurs while saving this file will be
# reopened with the relevant failures.
#
apiVersion: v1
kind: PersistentVolume
metadata:
  annotations:
    longhorn.io/volume-scheduling-error: ""
    pv.kubernetes.io/provisioned-by: driver.longhorn.io
    volume.kubernetes.io/provisioner-deletion-secret-name: ""
    volume.kubernetes.io/provisioner-deletion-secret-namespace: ""
  creationTimestamp: "2025-03-01T10:56:02Z"
  finalizers:
  - kubernetes.io/pv-protection
  - external-attacher/driver-longhorn-io
  name: pvc-d9f5176a-eb39-43e3-aca4-1bdfb038c109
  resourceVersion: "858626"
  uid: ee40da8b-e0ec-4255-a259-0d0816063786 # <-- delete this line!
spec:
  accessModes:
  - ReadWriteOnce
  capacity:
    storage: 1Gi
  claimRef:
    apiVersion: v1
    kind: PersistentVolumeClaim
Remove the UID line under the metadata section, save, and exit.
Then, we’ll need to specify the volume within the PersistentVolumeClaim definition in uptime-kuma.yaml:
# Deployment definition above
---
apiVersion: v1
kind: PersistentVolumeClaim
metadata:
  name: uptime-kuma-pvc
spec:
  accessModes:
    - ReadWriteOnce
  resources:
    requests:
      storage: 1Gi
  storageClassName: longhorn # https://kubernetes.io/docs/concepts/storage/storage-classes/#default-storageclass
  volumeName: pvc-d9f5176a-eb39-43e3-aca4-1bdfb038c109 # <-- Volume name found in Longhorn UI
Finally, if we re-apply our manifest:
kubectl apply -f uptime-kuma.yaml
We should now see the volume in an attached state in the Longhorn UI.

Conclusion
Longhorn is a powerful, flexible storage option for Kubernetes. I’m excited to start deploying things to my cluster now! My next step will be to install Tailscale and Traefik to use as ingress controllers and service objects.
What do you use for Kubernetes storage? Reach out to me on social media. I love talking about nerd stuff.
