Amazon Web Service (AWS) is an industry leader in cloud computing and cloud services. According to statista.com, AWS still holds the lead on cloud market share with 32% of cloud infrastructure being hosted on AWS as of Q2 2023.
There are tons of resources out there to learn how to use AWS. Amazon even has a suite of certifications that you can go after to add to your resume. But, luckily it doesn’t take much to get started with AWS. In this post I’ll walk you through how to set up a free AWS account to tinker around with. We’ll set up some basic best practices to secure your account and then you’ll be off to the races!
Sign Up for an AWS Account
When you sign up for an AWS account, you qualify for 12 months of free tier services. This includes things like certain EC2 instances, certain Amazon RDS instances, 5GB of S3 storage and much more.
Go to the aws website and sign up for an account by clicking the ‘Create AWS Account’ button in the top right corner. Be ready to check your email and phone number for verification codes. You will be required to enter a payment method. Don’t let this discourage you though; this is standard for any cloud service provider. You’ll only be charged for what you use, and as long as you only use the free tier services, you won’t be charged for anything.
Set up MFA on Root User Account
It’s best practice to set up multi-factor authentication (MFA) on all of your services that support it. That’s especially true for your AWS Root account. The root account has the keys to the kingdom. It can do everything, including messing with billing information and even deleting the entire account itself. So, we definitely want to make sure it’s protected.
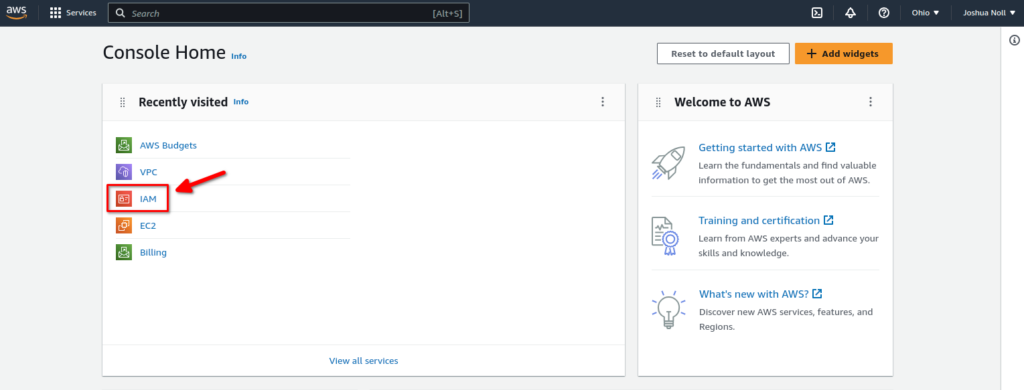
After your account is set up, log in as your root user with your email and password. Once logged in to your AWS console, click on the IAM button. If it’s not on the main screen, you can type IAM in the search bar and find it that way:
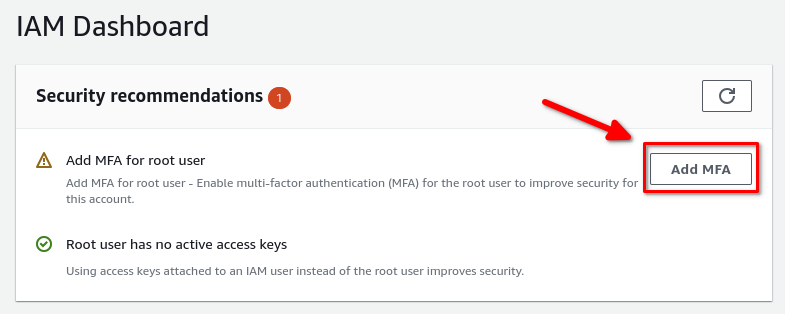
In the IAM dashboard, you should see security recommendations for adding MFA to your root user. Click on Add MFA:
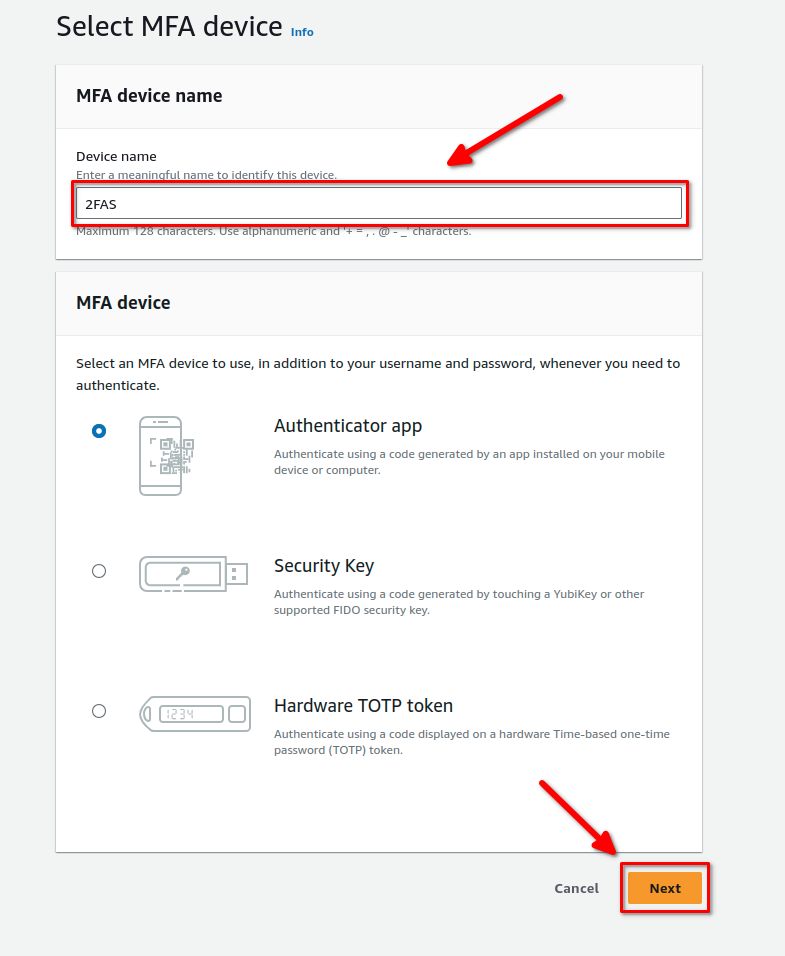
You have the option of using an authentication app, a security key or a hardware token. In my case, I’m using an authenticator app called 2FAS (which I highly recommend as it’s free, open source, works on android and iOS and has great backup and syncing capabilities). Give the device a name; you can call it whatever you want. Then click next:
A Note on MFA:
When using an authenticator app, it’s critical that you maintain backups of your tokens and recovery codes. 2FAS has a feature to sync with your iCloud account – this will ensure that you will still have your tokens if you get a new phone. I recommend turning features like this on. Additionally, when setting up MFA for various services (including AWS) you can usually find a recovery code somewhere in the security settings. I recommend keeping these on hand in case you ever lose access to your authenticator app.
However, keep your recovery codes either as a printed, physical copy or as an encrypted, local, digital copy. Avoid storing recovery codes on cloud-based storage. If an attacker ever got ahold of your recovery codes, they can access your accounts with it.
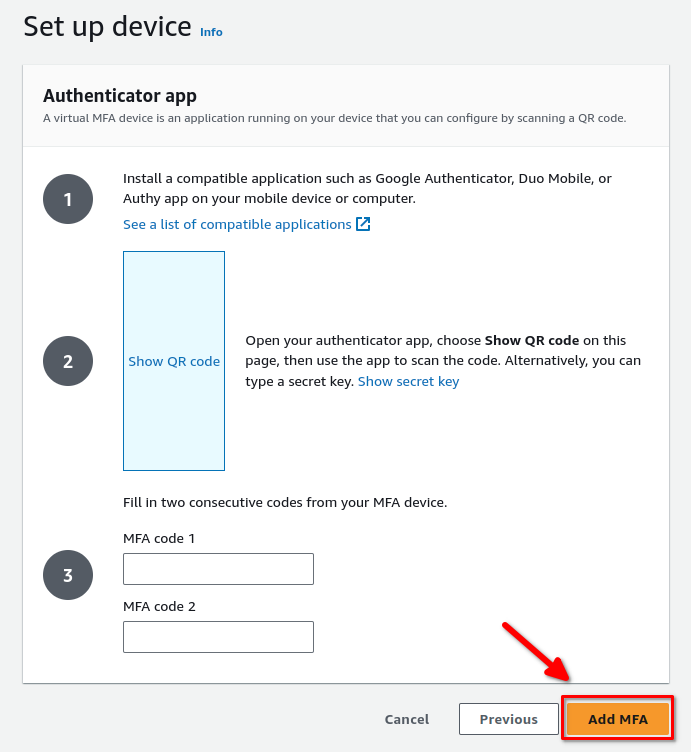
Get your authenticator app ready and follow the instructions on the screen. Once you’ve scanned the QR code and entered two consecutive codes, click Add MFA:
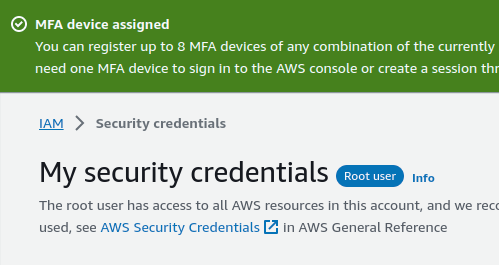
If all went well you should be brought back to your IAM dashboard and see a green banner indicating that MFA has been added:
Create an IAM User
Now we have our root user protected with MFA. But we really shouldn’t be using the root user for everything. Instead we’ll create an IAM user with privileged access. This user will be able to create and manage resources but not have the ability to delete the account or modify any billing information. This is what we’ll use to log in when we’re managing our AWS infrastructure.
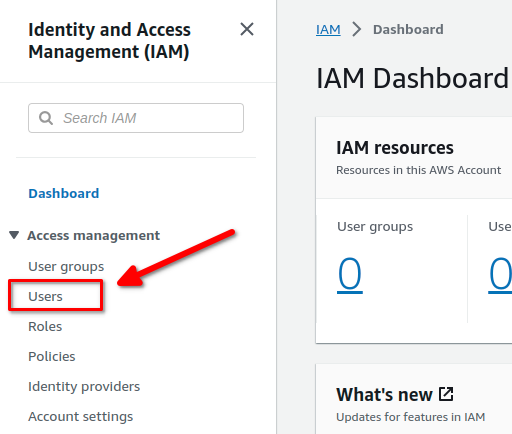
Lets go back to our IAM dashboard. Once you’re there, click on Users then click Create User:

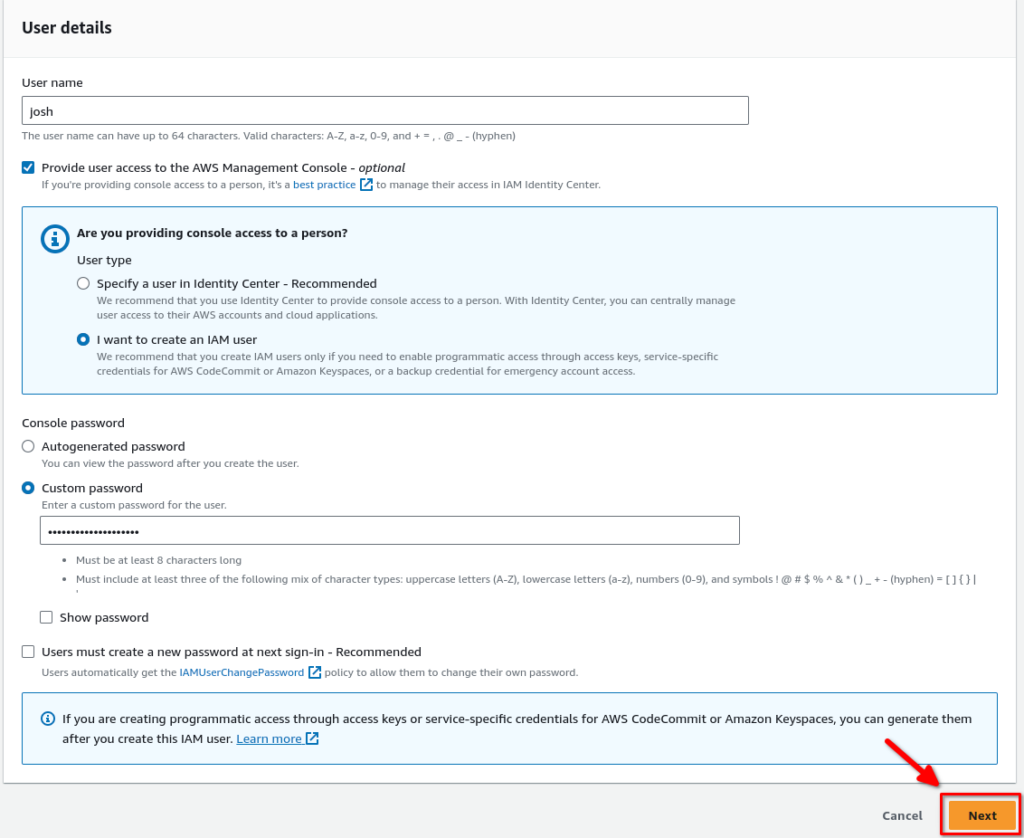
On the account creation screen, give your user a name (it can be whatever you want).
Check Provide user access to the AWS Management Console. Then click I want to create an IAM User. You’ll see some recommendations here about setting up a user in identity center. This isn’t really practical in our use case since our account is only being used by one person; ourselves.
Click custom password and generate a password for the user. You can uncheck User must create a new password at next sign-in since this is an account that we will be using ourselves. Finally, click next:
Click the return button on the following window. You will see a warning about having not retrieved the user’s password. You can accept this warning, as we can always reset the IAM user’s password with the Root account.
Set up MFA for IAM User
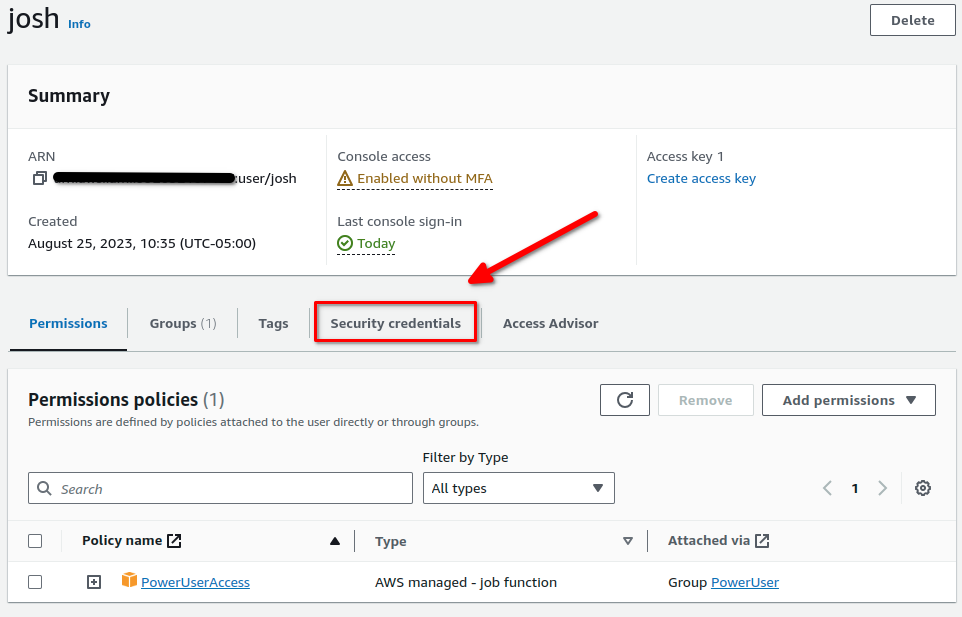
Now that we’ve created our IAM user, we’ll want to set up MFA on that account too. From the IAM dashboard, click on users again (you should have been brought right back here after creating the user). Then, click on the user’s name:

Then, click on the Security Credentials tab:
Click on Assign MFA Device:
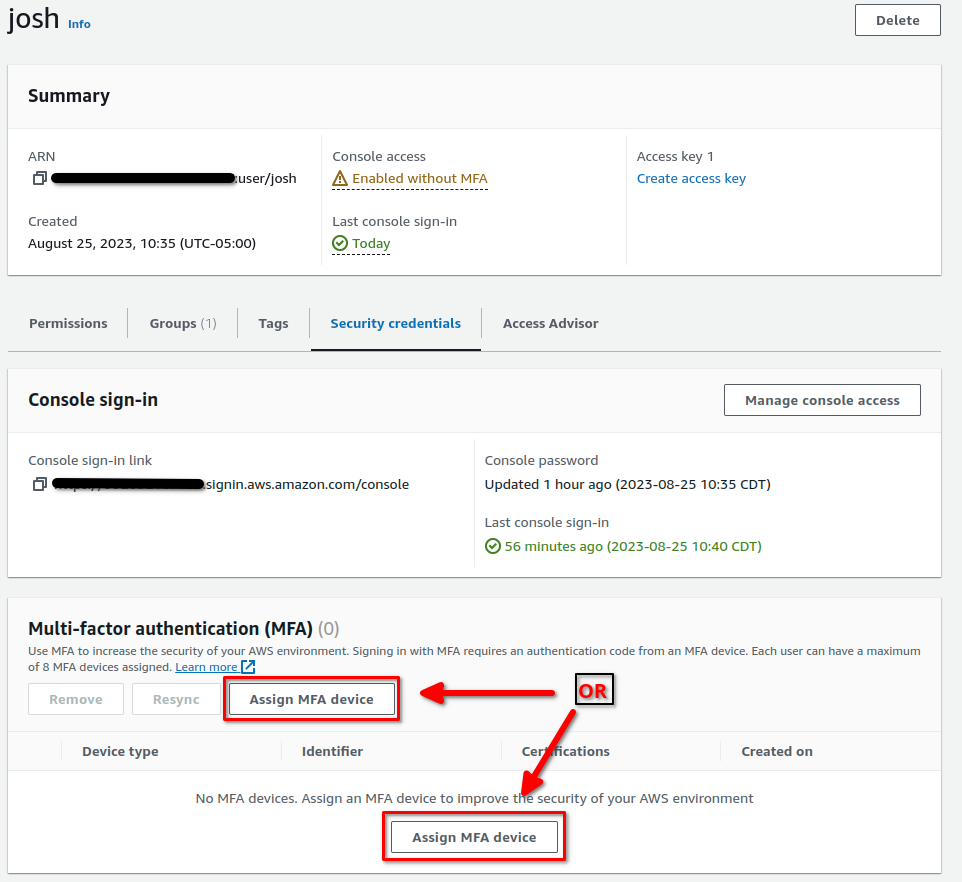
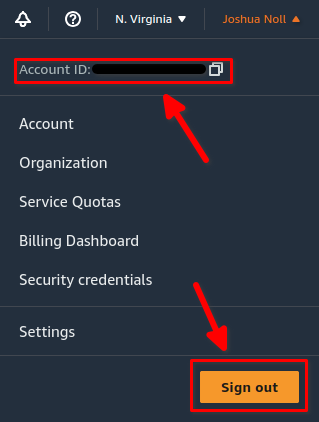
Now repeat the sequence we followed to set up MFA on the Root User account. Once complete, and you have the green banner, click on your account name in the top right of your AWS console. You’ll see a drop down like the one below. Make note of your account ID then click Sign out:
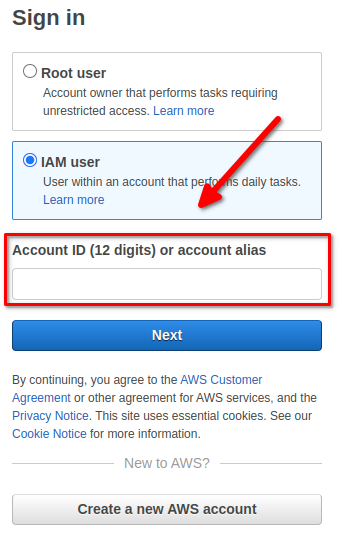
Once you’re back at the AWS homepage, click sign in again in the top right corner. At the login screen, select IAM user and enter your Account ID (use numbers only — ensure you omit any hyphens or dashes from it):
Then, log in with your IAM User’s name and password. You’re all set!
Now What?
Now you’re ready to start exploring. Learn how to manage storage with S3 or how to deploy virtual machines using Elastic Cloud Compute (EC2). Start studying for the AWS Cloud Practitioner exam and use your AWS account to get hands on experience with the topics you’re studying. Just be sure to check whether the services you’re deploying are in the AWS free tier, otherwise you’ll be charged for what you use!
